canon ae 1 program instruction manual

Welcome to the Canon AE-1 Program instruction manual, your guide to mastering this iconic film SLR camera. Discover its features, modes, and historical significance, ensuring optimal photography experiences.

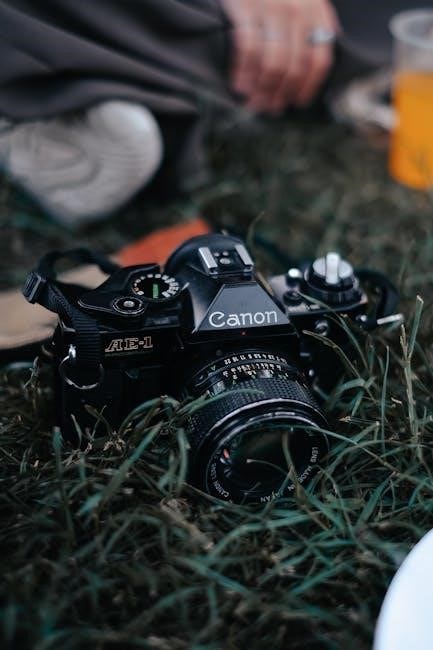
Overview of the Canon AE-1 Program Camera

The Canon AE-1 Program is a 35mm SLR film camera introduced in 1981, offering Program AE, manual, and shutter priority modes. It features a built-in TTL metering system, FD lens compatibility, and a durable build. The camera is known for its ease of use and advanced features, making it a favorite among photographers. With its sleek design and reliable performance, the AE-1 Program remains a timeless choice for film enthusiasts, combining classic functionality with modern convenience. Its versatility and enduring popularity solidify its place in photography history.

Historical Significance of the AE-1 Program

The Canon AE-1 Program holds a notable place in photography history as a bridge between manual and automatic shooting. Released in 1981, it followed the original AE-1, which sold over four million units, making it one of the best-selling SLRs. The Program version introduced advanced features like Program AE mode, enhancing accessibility for both professionals and amateurs. Its success helped establish Canon as a leader in the photography industry, leaving a lasting legacy in film photography and inspiring future camera designs with its innovative approach to automation and user-friendly interface.

Key Features of the Canon AE-1 Program

The Canon AE-1 Program offers Program AE mode, manual focus, and compatibility with Canon FD lenses, providing versatility for both automatic and manual photography experiences.

Build Quality and Design of the AE-1 Program

The AE-1 Program features a durable, lightweight body with a black finish, blending style and functionality. Its ergonomic design includes an intuitive control layout, making it user-friendly. The camera’s build emphasizes longevity, with a focus on mechanical reliability. The FD lens mount ensures compatibility with a wide range of lenses, enhancing versatility. Its classic design has made it a timeless favorite among photographers, balancing aesthetics and performance seamlessly.

Advanced Features for Enhanced Photography

The AE-1 Program offers advanced features like Program Mode, Shutter Priority, and Manual Mode, catering to both novice and professional photographers. It supports flash photography with compatibility with nine Canon Speedlites, ensuring versatile lighting control. The camera also features an automatic aperture setting when using FD lenses, enhancing ease of use. These advanced features make the AE-1 Program a versatile tool for capturing high-quality images with precision and creativity, making it a standout choice in film photography.

Operating Modes of the Canon AE-1 Program

The AE-1 Program offers Manual, Shutter Priority, and Program modes, providing flexibility for photographers to control exposure settings according to their creative preferences and lighting conditions.

Understanding Manual and Shutter Priority Modes

In Manual mode, photographers control both aperture and shutter speed for precise exposure. Shutter Priority mode allows setting the shutter speed, with the camera adjusting aperture automatically. Both modes cater to experienced photographers seeking control, especially in challenging lighting conditions. Manual mode is ideal for creative expression, while Shutter Priority is perfect for capturing motion or freezing moments. These modes require a good understanding of exposure principles for optimal results.

Program Mode for Automatic Exposure Control

The Program Mode on the Canon AE-1 Program offers automatic exposure control, simplifying photography for users of all skill levels. When the FD lens is set to the “A” position, the camera automatically adjusts both aperture and shutter speed for optimal results. This mode is ideal for quick shooting scenarios, ensuring properly exposed images without manual adjustments. It streamlines the photography process, allowing photographers to focus on composition and creativity while the camera handles technical settings.

Using the Canon AE-1 Program for Film Photography

The Canon AE-1 Program excels in film photography, offering manual control and automatic features. Its film transport is manual, with an optional winder for convenience, ensuring precise handling and compatibility with FD lenses for exceptional results in various shooting conditions.

Film Transport and Loading Process

Loading film into the Canon AE-1 Program is a straightforward process. First, ensure the camera is in manual mode. Open the back by pulling the film rewind knob. Align the film leader with the red mark, then gently pull the leader across the sprockets and onto the spool. Close the back and advance the film using the rapid rewind knob or lever until the counter reads “1.” This manual process ensures precise control over film handling, with optional winder for quicker shooting.

Best Practices for Manual Film Advance

Mastering manual film advance on the Canon AE-1 Program enhances your control over the shooting process. Always advance the film immediately after taking a shot to avoid double exposures. Use the film advance lever smoothly and completely to ensure the next frame is properly aligned. Avoid pressing the shutter without advancing, as this can damage the film or mechanism. After shooting the last frame, rewind the film carefully to prevent exposure to light. This method ensures precise handling and extends the camera’s longevity.

Accessories and Compatible Equipment

Enhance your Canon AE-1 Program experience with compatible FD lenses and Canon Speedlites for flash photography. These accessories ensure optimal performance and versatility in various shooting conditions.

Canon Speedlites for Flash Photography

Canon Speedlites offer advanced flash capabilities for the AE-1 Program, ensuring balanced lighting in various conditions. With nine compatible models, they provide automatic and manual flash control, enhancing creativity. The Speedlites integrate seamlessly with FD lenses, allowing for precise exposure adjustments. Their reliability and versatility make them essential tools for professional and amateur photographers seeking to capture high-quality images with optimal illumination and control.

FD Lens Compatibility and Usage

The Canon AE-1 Program is designed to work seamlessly with FD lenses, offering exceptional optical quality and versatility. These lenses provide precise control over aperture and focus, ensuring sharp images. When using FD lenses, set the aperture to the “A” position for automatic exposure in Program mode. This compatibility allows photographers to explore a wide range of creative possibilities, from wide-angle landscapes to telephoto portraits, with consistent performance and reliability.

Maintenance and Care for the AE-1 Program

Regularly clean the camera and lens to prevent dust and damage. Servicing by professionals is recommended to ensure optimal performance and longevity of your AE-1 Program.

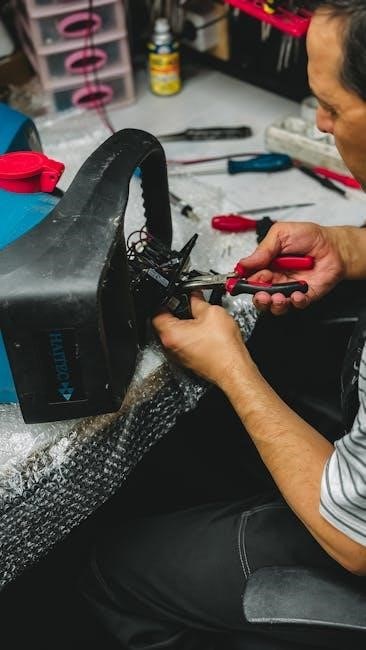
Cleaning and Servicing the Camera

Regular maintenance ensures the Canon AE-1 Program performs optimally; Use a soft, dry cloth to clean the exterior and lens. Avoid harsh chemicals or abrasive materials. For internal components, compressed air can gently remove dust. Professional servicing is recommended for complex repairs or deep cleaning. Regular cleaning prevents damage and extends the camera’s lifespan, ensuring sharp, clear images and smooth mechanical operation.

Extending the Life of Your AE-1 Program

Proper care ensures your Canon AE-1 Program remains functional for years. Store it in a cool, dry place, avoiding humidity. Use a silica gel packet to prevent moisture damage. Avoid extreme temperatures and direct sunlight. Always use a lens cap to protect the lens from dust and scratches. Regularly inspect and replace worn parts, like the light seals, to prevent leaks. Keep the battery compartment clean and avoid prolonged battery storage to prevent corrosion. These practices will help maintain your camera’s reliability and performance.

Troubleshooting Common Issues

Diagnose shutter and aperture malfunctions by checking for obstruction or wear. Adjust exposure settings if errors occur, ensuring proper alignment with the camera’s AE system specifications.

Diagnosing and Fixing Shutter and Aperture Problems

Identify issues by checking shutter curtains for tears or obstructions. Ensure aperture blades move smoothly and align properly. If the shutter doesn’t close, clean or replace it. For aperture errors, adjust the linkage or replace faulty components. Consult the manual or a professional for precise repairs to maintain your camera’s functionality and image quality effectively. Always use original Canon parts for optimal performance and longevity of your AE-1 Program.

Resolving Common Errors in AE Photography

Correct exposure issues by ensuring the lens is set to the A mode and the ISO is properly matched. For inconsistent results, clean the light meter or replace the batteries. If the camera doesn’t power on, check the battery compartment and connections. Adjust the aperture and shutter settings manually if AE modes malfunction. Regular maintenance and using genuine Canon FD lenses can prevent these errors, ensuring sharp and well-exposed photographs every time you shoot with your AE-1 Program.

Impact of the AE-1 Program on Photography

The Canon AE-1 Program revolutionized film photography with its advanced features, making it accessible to both professionals and amateurs. Its influence shaped photography education and practice.

Legacy of the AE-1 Program in Film Photography

The Canon AE-1 Program left an indelible mark on film photography, becoming a cornerstone of photography education and practice. Released in 1981, it combined manual control with advanced automatic features, appealing to professionals and hobbyists alike. Its intuitive design and reliability made it a favorite, with over four million units sold. Many photographers began their careers with this camera, and its influence continues to inspire film enthusiasts today, ensuring its place as a legendary tool in photographic history.

Modern Modifications and Digital Integrations

Enthusiasts have creatively modified the AE-1 Program, blending analog charm with digital convenience. One notable project involved integrating a compact digital camera’s internals, creating the “AE-1 Program Digital.” This innovative approach highlights the camera’s enduring appeal and adaptability. Such modernizations demonstrate how classic film cameras can evolve, offering new possibilities for photographers who appreciate both traditional techniques and contemporary technology, ensuring the AE-1 Program remains relevant in the digital era while preserving its iconic status.

Resources for Further Learning

Explore downloadable PDF manuals, online communities, and tutorial videos for in-depth guidance on the Canon AE-1 Program. These resources provide comprehensive support for mastering its functionality and troubleshooting.

Downloadable PDF Manuals and Guides

Access comprehensive guides and manuals for the Canon AE-1 Program online. Websites like lensinc.net offer downloadable PDF versions, providing detailed instructions, troubleshooting tips, and technical specifications. These resources are ideal for photographers seeking in-depth knowledge. Available in multiple languages, they ensure global accessibility. Whether you’re a novice or an experienced user, these manuals are essential for mastering the camera’s functionality and optimizing your photography experience with the Canon AE-1 Program.

Online Communities and Tutorial Videos

Explore online communities and tutorial videos dedicated to the Canon AE-1 Program. Platforms like YouTube offer detailed guides, such as a video showing camera usage with timestamps for easy navigation. Forums and groups share tips, troubleshooting, and creative techniques. These resources provide invaluable support for mastering the camera, from basic operations to advanced photography methods, fostering a vibrant community of photographers passionate about film photography and the AE-1 Program.

The Canon AE-1 Program remains a timeless tool for photographers, blending simplicity with advanced features. Its enduring legacy inspires shooters to experiment and capture moments with precision and creativity.

Final Thoughts on the AE-1 Program

The Canon AE-1 Program is a legendary camera that has left an indelible mark on film photography. Its robust build, intuitive design, and advanced features make it a timeless tool for photographers. Whether you’re a seasoned professional or a hobbyist, the AE-1 Program offers unparalleled creative control. With its manual modes, program auto-exposure, and compatibility with FD lenses, it empowers shooters to capture moments with precision and artistry. Its enduring popularity is a testament to its versatility and the joy it brings to the photographic process.

Encouragement to Explore and Experiment

The Canon AE-1 Program is a versatile tool that invites photographers to explore their creativity. With its manual and program modes, you can experiment with various techniques, from adjusting aperture and shutter speed to exploring different genres of photography. Don’t hesitate to try new approaches and push the boundaries of your skills. The AE-1 Program’s durability and compatibility with FD lenses make it an excellent companion for both learning and artistic expression.

ge universal remote user manual

Congratulations on purchasing the GE Universal Remote Control, designed to simplify your home entertainment experience. This versatile remote operates multiple devices, including TVs, Blu-ray players, soundbars, and more, using either AAA or AA batteries. Its ergonomic design and user-friendly interface make it easy to consolidate controls for up to 8 devices, enhancing convenience and reducing clutter. Learn how to program and customize it to suit your needs.

Unboxing and Initial Setup

When you unbox your GE Universal Remote, ensure all components are included. Typically, the package contains the remote control and a user manual. Begin by inserting two AAA or AA batteries, depending on your remote model, into the battery compartment located on the back. Avoid mixing old and new batteries to prevent leakage or performance issues. Once batteries are installed, the remote is ready for initial setup.

Aim the remote directly at your device, ensuring no obstructions are present. Select the appropriate device mode (e.g., TV, CBL, or AUX) using the MODE button. The remote is pre-configured to control most devices, so basic functionality should work immediately. For advanced features or specific device pairing, refer to the user manual. Always follow safety precautions and handle batteries carefully to avoid damage.

Programming the Remote

Programming the GE Universal Remote is straightforward, enabling control of multiple devices. Use auto code search, manual entry, or learn functions from original remotes. Features like master volume control enhance convenience and compatibility with various devices.

3.1 Using Auto Code Search

Using the auto code search feature on your GE Universal Remote is a convenient way to find the correct codes for your devices. To begin, turn on the device you wish to control. Next, press and hold the Setup button until the red indicator light turns on, then release it. The light will stay on, indicating the remote is in search mode. Press the button corresponding to the device you want to control (e.g., TV or CBL). The remote will automatically search for the correct code. When the device turns off or responds, press the Enter button to save the code. If the device does not respond, repeat the process until the correct code is found. This method saves time and eliminates the need for manual code entry, making it a user-friendly option for setting up your remote.

3.2 Manual Code Entry

Manual code entry is a reliable method for programming your GE Universal Remote when the auto code search does not yield results. Start by turning on the device you want to control. Press and hold the Setup button until the red light turns on, then release it. Enter the three or four-digit code corresponding to your device using the numeric keypad. Finish by pressing the Enter button. If the code is correct, the device will respond. If it does not work, repeat the process with a different code. This method is useful when you already have the codes for your devices or prefer a more direct approach. The manual provides a list of codes for various brands, or you can find them online. Ensure the codes match your specific device for proper functionality;

3.3 Learning Functions from Original Remotes

The GE Universal Remote features a unique learning capability, allowing it to adopt functions from your original device remotes. This feature is particularly useful for devices without predefined codes or for customizing controls. To use this function, ensure both the GE remote and the original remote are functioning and have clear line of sight. Press and hold the Setup button on the GE remote until the red light illuminates, then release it. Aim both remotes at each other and press the button on the original remote you wish to replicate. The GE remote will flash red as it learns the command. Repeat this process for all desired functions. This feature ensures compatibility with a wide range of devices and enhances your control experience, making the GE Universal Remote highly adaptable to your specific needs. This approach is ideal for personalizing your remote setup efficiently.

Customizing Button Functions

The GE Universal Remote allows you to customize button functions to tailor the remote to your preferences. This feature is ideal for optimizing control over your devices. To reassign a button, press and hold the Setup button until the red light turns on, then press the button you wish to reassign. Next, press the button on the original remote that corresponds to the function you want to assign. The red light will flash, confirming the customization. This process enables you to personalize your remote for easier access to frequently used functions. Additionally, the remote features a master volume control, allowing you to adjust volume across multiple devices seamlessly. You can also disable this feature if you prefer volume control to remain with a specific device. Customizing button functions ensures a more streamlined and personalized control experience, making the GE Universal Remote a versatile tool for your home entertainment system.

Troubleshooting Common Issues

If you encounter problems with your GE Universal Remote, there are several steps you can take to resolve them. First, ensure the remote has fresh batteries, as weak or dead batteries can cause malfunctions. If the remote is not responding, try resetting it by holding the Setup button until the red light turns on, then release it. This often resolves connectivity issues. If the remote fails to control a device, verify that the correct device mode is selected (e.g., TV, CBL). Additionally, check for any obstructions between the remote and the device, as infrared signals require a clear line of sight. If programming issues persist, try re-entering the device codes or using the auto code search feature. For more complex problems, refer to the user manual or contact customer support for assistance. Regular maintenance and proper care can help prevent many of these common issues.

Maintenance and Battery Care

To ensure optimal performance of your GE Universal Remote, regular maintenance and proper battery care are essential. Always use high-quality AAA or AA batteries, as specified in the manual, to avoid power issues. Avoid mixing old and new batteries, as this can reduce performance. If the remote is not in use for an extended period, remove the batteries to prevent leakage. Clean the remote periodically with a soft cloth to remove dirt or grease that may interfere with button functionality. Avoid exposing the remote to extreme temperatures, moisture, or direct sunlight, as this can damage internal components. If the infrared sensor becomes blocked, gently wipe it with a dry cloth to maintain signal clarity. Proper maintenance and care will extend the lifespan of your remote and ensure reliable operation. Replace batteries promptly when they weaken to maintain consistent control over your devices.

Advanced Features of the Remote

The GE Universal Remote offers several advanced features designed to enhance your control experience. One notable feature is the learning function, which allows the remote to adopt commands from your original device remotes, ensuring compatibility and customization. Additionally, the remote includes a master volume control, enabling you to adjust the volume of connected devices without switching modes. Some models feature backlit buttons for easier navigation in low-light environments. The remote also supports sleep timer functionality, allowing you to set a timer for your devices to turn off automatically. Furthermore, certain models include macro commands, which let you execute multiple actions with a single button press. These advanced features make the GE Universal Remote a versatile and user-friendly solution for managing your home entertainment system efficiently.

Compatibility with Various Devices

The GE Universal Remote is designed to work seamlessly with a wide range of audio/video devices, ensuring compatibility across various brands and models. It supports popular brands such as Samsung, LG, Sony, Vizio, and more, making it a versatile solution for your home entertainment needs. The remote can control up to 8 devices, including TVs, Blu-ray players, DVD players, streaming media devices, soundbars, and cable boxes. Its extensive code library ensures that you can easily find the right code for your specific device, whether it’s an older model or the latest smart TV. Additionally, the remote’s learning feature allows it to adapt to devices that may not be in its pre-programmed database, further enhancing its compatibility. With its broad range of supported devices and intuitive setup process, the GE Universal Remote is an excellent choice for streamlining your entertainment system.

Resetting the Remote to Factory Settings

Resetting your GE Universal Remote to factory settings can resolve issues like incorrect programming or device incompatibility. To perform a factory reset, follow these steps:
Press and hold the Setup button until the red indicator light turns on.
While still holding the Setup button, enter the code 9-8-1 using the number pad.
Release the Setup button and press it again until the red light blinks twice, confirming the reset.
This process erases all custom settings, returning the remote to its original state. Note that you will need to reprogram the remote for all devices after performing a factory reset. If the remote is unresponsive, ensure batteries are installed correctly and try the reset process again. This feature is useful for starting fresh or troubleshooting persistent issues. Always refer to your specific model’s manual for any additional reset instructions.

Additional Resources

For further assistance with your GE Universal Remote, explore the following resources:
– Visit the official GE website for downloadable user manuals, updated device codes, and firmware.
– Check out ManualsLib for a comprehensive library of GE Universal Remote manuals and guides.
– Refer to YouTube tutorials for step-by-step video instructions on programming and troubleshooting.
– Join online forums and communities to share tips and solutions with other users.
– Download the GE Universal Remote app (if available) for additional control features and updates.
– For specific models, such as the GE 8-Device Backlit Remote, visit Jasco Products for detailed support.
These resources will help you maximize your remote’s functionality and resolve any issues efficiently. Always refer to your specific model’s manual for tailored instructions.

Contact Information for Support

For any questions, concerns, or technical assistance regarding your GE Universal Remote, reach out to the dedicated support team. Visit the GE Appliances Support website for comprehensive resources, including FAQs, troubleshooting guides, and contact forms. You can also call their customer service hotline at 1-800-626-2002 for direct assistance. Additionally, Jasco Products, the licensee of GE-branded remotes, provides support at Jasco Support; For specific inquiries, email their support team at support@jasco.com. Ensure to have your remote model number ready for quicker assistance. These resources are designed to help you resolve issues and maximize your remote’s performance.

morse code chart pdf

Morse Code Chart PDF is a visual guide mapping letters, numbers, and symbols to their Morse Code equivalents․ Download it for easy translation and learning․

1․1 What is Morse Code?

Morse Code is a binary system of communication using dot and dash sequences to represent letters, numbers, and punctuation․ Developed in the 1830s by Samuel Morse, it was originally used for telegraphy․ Each character is translated into a unique sequence, with spaces separating letters and words․ For example, the letter “S” is “․․․”, while “O” is “—“․ This system relies on timing and rhythm, with standardized pauses between elements․ Widely used in early telecommunications, Morse Code remains relevant today in amateur radio, aviation, and maritime emergencies․ Its simplicity and reliability make it a timeless tool for efficient communication across distances․

1․2 Historical Significance of Morse Code

Morse Code, invented by Samuel Morse in the 1830s, revolutionized long-distance communication, enabling rapid transmission of messages via telegraph․ It became the backbone of early telecommunications, facilitating global connectivity․ During World Wars I and II, Morse Code played a critical role in military communications․ Its simplicity and reliability made it indispensable for radio operators, sailors, and aviators․ Even with modern advancements, Morse Code remains vital in niche areas like amateur radio and maritime emergencies․ Its enduring legacy is a testament to its impact on the evolution of communication technology, bridging the gap between the telegraph era and modern digital systems․

Understanding the Morse Code Chart

The Morse Code Chart is a visual guide that maps letters, numbers, and symbols to their unique dot-dash sequences․ It provides a standardized system for decoding and encoding messages, making it essential for learners and enthusiasts alike․ Download the chart to explore its structure and simplify your Morse Code journey․

2․1 Structure of the Morse Code Chart

The Morse Code Chart is structured to display letters (A-Z), numbers (0-9), and punctuation marks, each represented by unique sequences of dots (·) and dashes (-)․ These symbols are arranged in a grid or table format, often alphabetically or by frequency of use, to enhance readability․ The chart also includes spaces between characters and words for clarity․ Its design allows users to quickly identify and translate Morse Code sequences into text and vice versa․ The chart’s organization makes it a valuable tool for both beginners learning the code and experienced users needing quick reference․ Downloading a high-resolution PDF version ensures crisp visuals for easy study․

2․2 How to Read Morse Code Sequences

Reading Morse Code sequences involves interpreting patterns of dots (·) and dashes (-), separated by spaces․ Each letter, number, or punctuation mark corresponds to a unique sequence․ Start by identifying individual symbols, then combine them to form words or phrases․ A Morse Code Chart PDF provides a quick reference guide, mapping each character to its Morse equivalent․ Spaces between sequences indicate letter separation, while gaps of three dots represent word breaks․ Practice is key to improving speed and accuracy․ Beginners can use the chart to decode messages by matching sequences to their corresponding symbols․ This method ensures efficient translation of Morse Code into readable text․

Practical Applications of Morse Code

Morse Code is used in emergency communication, amateur radio, and aviation․ It aids in SOS signaling, navigation, and training․ Morse Code Chart PDF is essential for quick reference․

3․1 Emergency Communication and SOS Signals

Morse Code plays a vital role in emergency communication, particularly through the iconic SOS signal (․․․—․․․)․ This universal distress code is instantly recognizable and has saved countless lives․ In maritime and aviation emergencies, Morse Code remains a reliable method for sending critical alerts․ The Morse Code Chart PDF provides quick reference for translating emergency signals, ensuring rapid response․ Beyond SOS, it includes codes for injuries and location guidance, aiding rescuers in understanding the situation․ This system’s simplicity and effectiveness make it indispensable in life-threatening scenarios, even in modern times․

3․2 Amateur Radio and Telecommunications

Morse Code remains a cornerstone in amateur radio and telecommunications, enabling enthusiasts to communicate globally using a simple yet effective system․ The Morse Code Chart PDF serves as an essential tool for ham radio operators, providing quick reference for translating text to code and vice versa․ Amateur radio operators often use Morse Code for its reliability in low-bandwidth conditions, ensuring clear communication even in challenging environments․ The chart supports all languages, making it a universal resource for international exchanges․ Whether for casual chats or competitions, Morse Code fosters a sense of community and skill among operators․ Download the chart to enhance your amateur radio experiences and master the art of Morse Code communication․

3․3 Educational Purposes and Learning Tools

The Morse Code Chart PDF is a valuable educational resource for teaching and learning Morse Code․ Educators use it to create engaging lessons, while students rely on it to memorize sequences for letters, numbers, and symbols․ The chart’s structured format simplifies the learning process, making it easier to grasp the basics․ Many educational tools and apps incorporate the chart to offer interactive learning experiences; For instance, learners can practice translating text to Morse Code and vice versa using the chart as a reference․ It also supports classroom activities, such as decoding exercises and quizzes, fostering a deeper understanding of Morse Code․ This makes it an indispensable tool for both beginners and experienced learners․

How to Use a Morse Code Chart PDF

A Morse Code Chart PDF serves as a visual guide for translating text to Morse Code and vice versa․ Download and print it for easy reference․

4․1 Downloading and Printing the Chart

To use a Morse Code Chart PDF, start by downloading it from reliable sources online․ Ensure the file is in high resolution for clarity․ Print it on standard paper using a printer․ The chart typically includes letters, numbers, and punctuation with their Morse equivalents․ Once printed, it serves as a quick reference for translation․ Many websites offer free downloads, such as FormsBank, which provides customizable and printable versions․ After printing, you can laminate it for durability․ This chart is essential for beginners and enthusiasts alike, making Morse Code learning and translation accessible and straightforward․ Always verify the source for accuracy․

4․2 Translating Text to Morse Code and Vice Versa

Using a Morse Code Chart PDF, translation is straightforward․ Start by locating each letter or number on the chart and writing down its Morse equivalent․ For example, “A” becomes “․-“, and “1” becomes “․—-“․ To translate Morse to text, reverse the process by matching sequences to their corresponding characters․ Online tools can also automate this process for efficiency․ Ensure accuracy by double-checking each symbol․ This method is ideal for learners and enthusiasts, making Morse Code accessible and practical for communication or study․ Regular practice enhances proficiency in both encoding and decoding․

Learning and Practicing Morse Code

Mastering Morse Code requires consistent practice and dedication․ Start with the Morse Code Chart PDF to systematically learn each symbol and its sequence․ Begin with common letters and numbers, gradually progressing to full sentences and complex messages․ Regular practice enhances speed and accuracy, making communication smoother and more efficient․ Utilize online tools or mobile apps to supplement your learning journey and track progress effectively․

5․1 Best Methods for Beginners

Beginners can effectively learn Morse Code by starting with the Morse Code Chart PDF, which provides a clear visual mapping of letters, numbers, and symbols․ Focus on common characters first, such as “E” (·) and “T” (-), as they appear frequently․ Use the Koch method, which teaches characters at full speed from the start, or the Farnsworth method, which spaces characters for better comprehension․ Practice short sessions daily to build familiarity․ Incorporate tools like flashcards or mobile apps to reinforce learning․ Listen to recorded Morse Code sequences to improve recognition skills․ Regular practice and consistency are key to mastering the code efficiently․

5․2 Tools and Resources for Practice

To effectively practice Morse Code, utilize a variety of tools and resources․ Download a Morse Code Chart PDF for quick reference, featuring letters, numbers, and symbols․ Online translators convert text to Morse Code instantly, aiding in real-time practice․ Mobile apps like Morse Code Translator offer interactive lessons and exercises․ Websites with audio clips allow you to listen to Morse Code sequences, improving recognition skills․ Additionally, online courses and tutorials provide structured learning paths․ Flashcards and printable charts are excellent for offline study․ Joining amateur radio communities or forums can connect you with experienced practitioners for guidance and support․ Consistent use of these tools ensures steady progress in mastering Morse Code․

Morse Code remains a timeless communication tool, with the Morse Code Chart PDF serving as an essential resource for learners and enthusiasts alike․ Its enduring relevance bridges past and present․

6․1 Importance of Morse Code in Modern Times

Despite the rise of digital communication, Morse Code retains its significance in niche areas like amateur radio and emergency operations․ The Morse Code Chart PDF remains a handy tool for quick reference, enabling enthusiasts to decode and encode messages efficiently․ Its simplicity and reliability make it indispensable in situations where modern technology fails, such as during natural disasters or remote expeditions․ Additionally, it serves as a valuable educational resource, teaching historical communication methods and fostering problem-solving skills․ The chart’s accessibility ensures that Morse Code stays relevant, bridging the gap between past and present communication techniques․

6․2 Final Tips for Mastering Morse Code

To master Morse Code, start by practicing short sessions daily, focusing on recognizing patterns rather than individual dots and dashes․ Use the Morse Code Chart PDF as a quick reference to build familiarity with sequences․ Begin with common codes like the SOS signal and gradually progress to more complex sequences․ Flashcards and apps can enhance memorization, while listening to recorded Morse Code improves auditory recognition․ Join amateur radio clubs or online communities for motivation and real-world practice․ Consistency and patience are key—mastering Morse Code is a skill that develops over time with dedicated effort․

samsung refrigerator rs265tdrs owners manual

Welcome to the Samsung RS265TDRS Refrigerator‚ a side-by-side model offering 26 cu. ft. of storage‚ advanced features like Twin Cooling System‚ and an in-door icemaker for enhanced convenience.

1.1 Overview of Features and Benefits

The Samsung RS265TDRS refrigerator offers a spacious 26 cu. ft. capacity‚ ideal for large families. Its side-by-side design provides easy access to both fresh food and frozen items. Key features include the Twin Cooling System‚ which maintains optimal humidity and temperature‚ and an in-door icemaker for convenient ice access. The Power Freeze and Power Cool options quickly chill or freeze items‚ while spill-proof glass shelves ensure easy cleaning and organization.

1.2 Importance of Reading the Owner’s Manual

Reading the owner’s manual is essential for understanding the Samsung RS265TDRS refrigerator’s features‚ operation‚ and maintenance. It provides safety guidelines‚ warranty details‚ and troubleshooting tips. The manual helps users optimize performance‚ ensure longevity‚ and address common issues. By following the instructions‚ users can make the most of their appliance while minimizing risks and maintenance costs. Familiarizing yourself with the manual ensures safe and efficient usage of your refrigerator.

Safety Information

Ensure safe operation by following guidelines in the manual‚ avoiding overheating‚ and keeping flammable materials away. Always maintain proper ventilation and secure electrical connections to prevent hazards.

2.1 General Safety Precautions

Adhere to safety guidelines to prevent accidents. Keep flammable materials away from the refrigerator and avoid placing hot objects near it. Ensure proper ventilation and maintain a safe distance from heating appliances. Prevent children from playing with doors or controls. Never override safety features or modify the appliance. Follow all instructions in the manual to ensure safe and efficient operation of your Samsung RS265TDRS Refrigerator.

2.2 Electrical Safety Guidelines

Ensure the refrigerator is properly grounded and plugged into a dedicated 115V AC outlet. Avoid using extension cords or overloaded circuits. Keep the electrical components dry and avoid exposing the appliance to moisture. Regularly inspect the power cord for damage and replace it if necessary. Never attempt repairs unless you are qualified‚ and always follow the manufacturer’s electrical guidelines for safe operation.

2.3 Child Safety Features

The Samsung RS265TDRS features a door alarm that sounds if doors are left open‚ preventing accidental access by children. A child lock function on the dispenser ensures kids cannot accidentally dispense water or ice. Additionally‚ secure the area around the refrigerator and keep cleaning products out of reach to maintain a safe environment for children.

Installation and Setup

Proper installation ensures optimal performance. Unpack carefully‚ place on a level surface‚ and connect water and electrical supplies as per the manual’s instructions for safe operation.

3.1 Unpacking and Placement Guidelines

When unpacking the Samsung RS265TDRS‚ ensure all packaging materials are removed carefully. Place the refrigerator on a level‚ sturdy floor to prevent tilting. Avoid direct sunlight and heat sources. Ensure at least 1 inch of clearance around the sides and back for proper ventilation. Position the unit away from walls to allow easy access for maintenance. Follow these guidelines to ensure optimal performance and longevity.

3.2 Leveling and Aligning the Refrigerator

Leveling ensures even door closure and proper operation. Use a spirit level to check balance. Adjust the feet by turning them clockwise or counterclockwise; Ensure all four corners are in contact with the floor. Align doors to maintain sealing and prevent air leaks. Tighten all screws after adjustments. Proper leveling prevents noise‚ vibration‚ and ensures efficient cooling. Follow manual instructions for precise alignment and stability.

3.3 Connecting Water and Electrical Supplies

Connect the water supply line to the refrigerator’s inlet valve‚ ensuring no leaks. Use the provided adapter for secure installation. Plug the refrigerator into a grounded 120V electrical outlet‚ avoiding extension cords. Verify the power cord is securely connected; Check the manual for specific electrical requirements. Ensure water pressure is within recommended levels to prevent damage. Turn on the water supply and test the dispenser to confirm proper connection. Follow safety guidelines to avoid electrical hazards or water damage.

Operating the Refrigerator

Operate your Samsung RS265TDRS by adjusting settings via the control panel‚ monitoring temperatures‚ and using the ice maker and water dispenser. Regularly check and maintain optimal settings for performance and energy efficiency.

4.1 Understanding the Control Panel

The control panel on your Samsung RS265TDRS refrigerator allows you to easily manage settings like temperature‚ ice maker‚ and water dispenser. Use the buttons to adjust the freezer and fridge temperatures‚ turn the ice maker on/off‚ and activate features like Power Freeze and Power Cool. The panel also includes indicators for door alarms and filter replacement reminders‚ ensuring your appliance runs efficiently and maintains optimal performance.

4.2 Adjusting Temperature Settings

The Samsung RS265TDRS refrigerator allows precise temperature control using the digital display on the control panel. Set the freezer between -14°F and 5°F and the fridge between 32°F and 50°F for optimal performance. Use the arrows to adjust settings and ensure proper food storage. Check temperatures periodically and adjust based on usage. Avoid extreme settings to maintain energy efficiency and appliance longevity. Refer to the manual for detailed guidance on temperature calibration.

4.3 Using the Ice Maker and Water Dispenser

To use the ice maker‚ ensure it is turned on via the control panel. Allow time for ice production. For the water dispenser‚ press and hold your glass against the paddle. Regularly check the water filter and replace it every 6-12 months. If issues arise‚ consult the manual for troubleshooting steps. Proper maintenance ensures consistent performance and clean water supply. Always refer to the user manual for specific instructions.

Maintenance and Cleaning

Regularly clean shelves and compartments to maintain hygiene. Check door seals for tightness and inspect for wear. Replace water filters every 6-12 months for optimal performance.

5.1 Regular Cleaning Tips

Regular cleaning ensures optimal performance and hygiene. Turn off power before cleaning. Wipe shelves and compartments with mild soap and warm water. Check door seals for dirt and moisture. Clean the exterior with a soft cloth to prevent scratches. Avoid harsh chemicals that may damage surfaces. Regularly inspect and clean the drain to prevent clogs. This helps maintain freshness and prevents odor buildup.

5.2 Defrosting and Maintenance Schedules

Defrost every 3-6 months to ensure efficiency. Turn off power and let ice melt naturally. After defrosting‚ clean and dry interior. Check for worn seals and replace if necessary. Schedule annual professional maintenance for compressor and cooling systems. Regularly inspect water filters and replace them every 6 months. Follow these schedules to maintain optimal performance and extend appliance lifespan. Always refer to the manual for specific timing and procedures. Proper maintenance prevents costly repairs. Stay proactive to keep your refrigerator running smoothly. Consistency is key to longevity and efficiency.

5.3 Replacing Water Filters

Replace the water filter every 6 months to maintain water quality. Locate the filter inside the refrigerator or in the water supply line. Turn off the water supply before removal. Twist and pull the old filter‚ then install the new one by twisting until it clicks. Flush the system by running water for 2 minutes. Reset the filter indicator via the control panel or by pressing and holding the button. Refer to the manual for specific instructions. Regular replacement ensures clean water and optimal performance. Always use Samsung-approved filters for compatibility and safety. Follow these steps to keep your water fresh and tasting great. Proper installation prevents leaks and maintains system efficiency. Stay on schedule to avoid reduced water flow and ice production. Replace filters promptly to protect your appliance and enjoy better tasting water. Clean water is essential for health‚ so don’t delay replacements. Keep track of your filter’s lifespan using the indicator light. Replace filters even if usage is low to prevent bacterial growth. Clean water is just a replacement away‚ ensuring your family’s health and satisfaction. Always check the manual for exact replacement intervals and procedures. This simple maintenance task keeps your refrigerator working at its best. Replace filters regularly to enjoy fresh‚ clean water and ice. It’s a quick process that makes a big difference in water quality. Don’t forget to reset the indicator after replacement to monitor the next schedule. Proper filter maintenance is key to your refrigerator’s performance and longevity. Stay proactive with replacements for consistent results. Your refrigerator depends on clean filters to deliver great tasting water. Make replacement a priority for optimal performance. Regular filter changes are essential for maintaining your appliance’s efficiency and your family’s health. Replace filters as recommended to keep everything running smoothly. Fresh water is just a filter change away‚ so stay on track with replacements. This simple task ensures your refrigerator continues to provide clean water and ice. Replace filters every 6 months without fail for the best results. Your refrigerator will thank you with consistent performance and fresh water. Keep your water tasting great by replacing filters on time. It’s a small step that makes a big difference in water quality. Always use genuine Samsung filters for the best performance and safety. Replace filters regularly to keep your refrigerator in top shape. Clean water is just a replacement away‚ so don’t wait. Replace filters every 6 months to ensure your water stays fresh and clean. It’s a quick and easy process that’s essential for your appliance’s health. Stay on schedule with filter replacements for optimal results. Your refrigerator needs clean filters to deliver great tasting water. Make it a habit to replace them regularly; This simple maintenance task keeps your appliance running smoothly. Replace filters every 6 months to enjoy fresh‚ clean water and ice. It’s a quick process that ensures your refrigerator performs at its best. Don’t forget to reset the indicator after replacing the filter. Regular replacements are key to maintaining your refrigerator’s performance and longevity. Replace filters as recommended to keep everything running smoothly. Fresh water is just a filter change away‚ so stay on track with replacements. This simple task ensures your refrigerator continues to provide clean water and ice. Replace filters every 6 months without fail for the best results. Your refrigerator will thank you with consistent performance and fresh water. Keep your water tasting great by replacing filters on time; It’s a small step that makes a big difference in water quality. Always use genuine Samsung filters for the best performance and safety. Replace filters regularly to keep your refrigerator in top shape. Clean water is just a replacement away‚ so don’t wait. Replace filters every 6 months to ensure your water stays fresh and clean. It’s a quick and easy process that’s essential for your appliance’s health. Stay on schedule with filter replacements for optimal results. Your refrigerator needs clean filters to deliver great tasting water. Make it a habit to replace them regularly. This simple maintenance task keeps your appliance running smoothly. Replace filters every 6 months to enjoy fresh‚ clean water and ice. It’s a quick process that ensures your refrigerator performs at its best. Don’t forget to reset the indicator after replacing the filter. Regular replacements are key to maintaining your refrigerator’s performance and longevity. Replace filters as recommended to keep everything running smoothly. Fresh water is just a filter change away‚ so stay on track with replacements. This simple task ensures your refrigerator continues to provide clean water and ice. Replace filters every 6 months without fail for the best results. Your refrigerator will thank you with consistent performance and fresh water. Keep your water tasting great by replacing filters on time. It’s a small step that makes a big difference in water quality. Always use genuine Samsung filters for the best performance and safety. Replace filters regularly to keep your refrigerator in top shape. Clean water is just a replacement away‚ so don’t wait. Replace filters every 6 months to ensure your water stays fresh and clean. It’s a quick and easy process that’s essential for your appliance’s health. Stay on schedule with filter replacements for optimal results. Your refrigerator needs clean filters to deliver great tasting water. Make it a habit to replace them regularly. This simple maintenance task keeps your appliance running smoothly. Replace filters every 6 months to enjoy fresh‚ clean water and ice. It’s a quick process that ensures your refrigerator performs at its best. Don’t forget to reset the indicator after replacing the filter. Regular replacements are key to maintaining your refrigerator’s performance and longevity. Replace filters as recommended to keep everything running smoothly. Fresh water is just a filter change away‚ so stay on track with replacements. This simple task ensures your refrigerator continues to provide clean water and ice. Replace filters every 6 months without fail for the best results. Your refrigerator will thank you with consistent performance and fresh water. Keep your water tasting great by replacing filters on time. It’s a small step that makes a big difference in water quality. Always use genuine Samsung filters for the best performance and safety. Replace filters regularly to keep your refrigerator in top shape. Clean water is just a replacement away‚ so don’t wait. Replace filters every 6 months to ensure your water stays fresh and clean. It’s a quick and easy process that’s essential for your appliance’s health. Stay on schedule with filter replacements for optimal results. Your refrigerator needs clean filters to deliver great tasting water. Make it a habit to replace them regularly. This simple maintenance task keeps your appliance running smoothly. Replace filters every 6 months to enjoy fresh‚ clean water and ice. It’s a quick process that ensures your refrigerator performs at its best. Don’t forget to reset the indicator after replacing the filter. Regular replacements are key to maintaining your refrigerator’s performance and longevity. Replace filters as recommended to keep everything running smoothly. Fresh water is just a filter change away‚ so stay on track with replacements. This simple task ensures your refrigerator continues to provide clean water and ice. Replace filters every 6 months without fail for the best results. Your refrigerator will thank you with consistent performance and fresh water. Keep your water tasting great by replacing filters on time. It’s a small step that makes a big difference in water quality. Always use genuine Samsung filters for the best performance and safety. Replace filters regularly to keep your refrigerator in top shape. Clean water is just a replacement away‚ so don’t wait. Replace filters every 6 months to ensure your water stays fresh and clean. It’s a quick and easy process that’s essential for your appliance’s health. Stay on schedule with filter replacements for optimal results. Your refrigerator needs clean filters to deliver great tasting water. Make it a habit to replace them regularly. This simple maintenance task keeps your appliance running smoothly. Replace filters every 6 months to enjoy fresh‚ clean water and ice. It’s a quick process that ensures your refrigerator performs at its best. Don’t forget to reset the indicator after replacing the filter. Regular replacements are key to maintaining your refrigerator’s performance and longevity. Replace filters as recommended to keep everything running smoothly. Fresh water is just a filter change away‚ so stay on track with replacements. This simple task ensures your refrigerator continues to provide clean water and ice. Replace filters every 6 months without fail for the best results. Your refrigerator will thank you with consistent performance and fresh water. Keep your water tasting great by replacing filters on time. It’s a small step that makes a big difference in water quality. Always use genuine Samsung filters for the best performance and safety. Replace filters regularly to keep your refrigerator in top shape. Clean water is just a replacement away‚ so don’t

Additional Resources

Troubleshooting Common Issues

Identify and resolve common issues like noise‚ temperature fluctuations‚ or ice maker malfunctions. Refer to the manual for detailed solutions or contact Samsung support for assistance.

scansnap ix500 manual

The ScanSnap iX500 is Fujitsu’s next-generation scanner, designed for high-speed duplex scanning. It supports both PC and Mac, offering efficient document management solutions for home and office use.

Overview of the Scanner and Its Features

The ScanSnap iX500 is a high-speed duplex scanner designed for efficient document management. It supports both PC and Mac, offering compatibility with the latest operating systems, including Windows 11 and macOS. The scanner boasts a compact design and user-friendly interface, making it ideal for home and office use. With the ability to scan up to 25 pages per minute or 50 images per minute, it delivers fast and reliable performance. The scanner also features advanced paper handling capabilities, including automatic document feeders and double-sided scanning. Its robust software suite, including ScanSnap Manager, enhances scanning workflows and integrates seamlessly with popular productivity tools.

Key Benefits and Capabilities of the ScanSnap iX500

The ScanSnap iX500 offers exceptional scanning speed, handling up to 25 pages per minute or 50 images per minute, making it ideal for high-volume tasks. Its duplex scanning capability allows simultaneous scanning of both document sides, saving time and effort. The scanner supports PDF and JPEG formats, enabling versatile document management. With its compact and lightweight design, it fits seamlessly into any workspace. The included ScanSnap Manager software enhances productivity by streamlining workflows and integrating with popular productivity tools. Its compatibility with both Windows and macOS ensures universal usability, while its robust build ensures long-term reliability for demanding environments.

System Requirements and Compatibility

The ScanSnap iX500 is compatible with both Windows and macOS operating systems, connects via USB 3.0, and requires the latest OS versions and ScanSnap software installed.

Operating System Compatibility (Windows, macOS, etc.)

The ScanSnap iX500 is compatible with Windows 10, Windows 11, and macOS 10.15 or later. Drivers are easy to install on Windows systems, including the latest Windows 11. For macOS, ensure your system is updated to the latest version for optimal performance. The scanner seamlessly integrates with both operating systems, offering a smooth scanning experience. Regular software updates are recommended to maintain compatibility and functionality. Additionally, the scanner supports USB 3.0 connectivity, ensuring fast data transfer speeds.

Hardware Requirements for Optimal Performance

The ScanSnap iX500 requires a USB 3.0 port for connection and operates with a free AC adapter for power. It supports systems with at least a 2.0 GHz processor, 4GB RAM, and 4.5GB of free disk space. For Wi-Fi connectivity, an optional wireless network setup is available. Ensure your computer meets these specifications to ensure smooth operation. The scanner is lightweight and compact, making it easy to integrate into any workspace. Proper installation of drivers and software ensures optimal performance and compatibility with your system.

Installation and Setup Guide

The ScanSnap iX500 setup involves unpacking, connecting via USB or wirelessly, and installing drivers from the included disc or Fujitsu’s official website. Use the Quick Setup Guide for easy installation and ensure proper software installation for optimal functionality.

Step-by-Step Installation Process

Start by unpacking the scanner and connecting it via USB or wirelessly. Download the latest drivers and software from Fujitsu’s official website. Launch the setup wizard, follow on-screen instructions to install the software, and select your preferred connection method. Once installed, test the scanner by scanning a document to ensure proper functionality. Refer to the user manual for detailed troubleshooting steps if issues arise during installation.

Connecting the Scanner to Your Computer or Network

To connect the ScanSnap iX500, you can use a USB cable or set up a wireless connection. For USB, plug the scanner into your computer and install the drivers from the Fujitsu website. For wireless, select the scanner’s network from your device’s Wi-Fi settings and enter the password; Ensure both devices are on the same network for proper functionality. The manual provides detailed instructions for both methods, and troubleshooting tips are available if issues arise during the connection process.

Basic Scanning Operations

The ScanSnap iX500 offers quick and efficient document scanning, handling up to 25 pages per minute with options for single or double-sided scans and saving files as PDF or JPEG.

Quick Start Guide for Scanning Documents

To begin scanning, connect the ScanSnap iX500 to your computer or network. Install the included software and power on the scanner. Load documents face down in the feeder or flatbed. Select scanning settings like single or double-sided, resolution, and file format (PDF or JPEG). Click “Scan” to start the process. The scanner handles up to 25 pages per minute, automatically detecting and adjusting for document size. Once done, save or organize your files as needed. This quick setup ensures efficient scanning for home or office use.

Scanning Modes (Single-Sided, Double-Sided, etc.)

The ScanSnap iX500 offers versatile scanning modes to suit different needs. Single-sided mode scans one side of a document, while double-sided mode captures both front and back simultaneously. The scanner also supports auto-detection of document size and orientation, ensuring accurate results. Additionally, it handles various document types, from standard sheets to photos. The intuitive interface allows users to easily select their preferred scanning mode, optimizing efficiency for both personal and professional use.

Advanced Scanning Features

The ScanSnap iX500 includes advanced features like OCR for editable text, custom scan profiles, and Wi-Fi connectivity for direct scanning to mobile devices, enhancing productivity seamlessly.

Using the ScanSnap Software for Enhanced Scanning

The ScanSnap software offers advanced features to optimize your scanning experience. It enables OCR (Optical Character Recognition) for creating editable documents and supports custom scan profiles tailored to specific needs. Users can also utilize Wi-Fi connectivity for direct scanning to mobile devices, enhancing flexibility. The software integrates seamlessly with cloud services, allowing easy document sharing and storage. Additionally, it supports batch scanning and automatic file naming, streamlining workflows. With its intuitive interface, the ScanSnap software empowers users to manage documents efficiently, ensuring high-quality scans and organized digital files.

Customizing Scan Settings for Specific Needs

The ScanSnap iX500 allows users to tailor scan settings to meet specific requirements. Adjust preferences such as resolution, color mode, and file format (PDF, JPEG, or TIFF) to suit the task. Utilize automatic cropping and straightening for clean, professional results. Custom scan profiles can be saved for frequent tasks, such as scanning receipts or photos. Additionally, users can enable OCR for editable text or set up automatic file naming for organization. These customizable options ensure scans are optimized for their intended use, whether for archiving, sharing, or editing, making the ScanSnap iX500 versatile for various workflows.

Document Management and Organization

The ScanSnap iX500 simplifies document management by allowing users to save scans as PDF or JPEG files, enabling efficient organization and streamlined workflows for home or office use.

Saving Scanned Files in PDF or JPEG Format

The ScanSnap iX500 allows users to save scanned documents in either PDF or JPEG format, offering flexibility for different needs. PDF is ideal for maintaining document structure and text searchability, while JPEG is suitable for image-focused scans. During the scanning process, users can select their preferred format through the ScanSnap software. The scanner also supports automatic text recognition in PDFs, enhancing accessibility and usability. This feature ensures that scanned files are compatible with various applications and workflows, making it easy to organize and share documents efficiently.

Organizing and Storing Scanned Documents Efficiently

The ScanSnap iX500 simplifies document organization with features like automatic file naming and folder creation based on scan settings. Users can easily sort and store scanned files in designated folders on their computer or cloud storage services. The scanner also supports direct exports to popular platforms like Dropbox or Google Drive, ensuring seamless integration with existing workflows. Additionally, the ScanSnap software allows users to categorize and tag documents, making it easier to locate specific files later. This streamlined approach helps maintain a clutter-free and organized digital archive, enhancing productivity and accessibility across devices.

Maintenance and Troubleshooting

Regularly clean the scanner with approved supplies to prevent dust buildup. Avoid using water or aerosol sprays. Refer to the manual for replacing consumables and resolving common errors like insufficient disk space or PDF formatting issues.

Cleaning and Maintaining the Scanner

Regular maintenance ensures optimal performance of the ScanSnap iX500. Use a soft, dry cloth to wipe the exterior and avoid harsh chemicals or aerosol sprays. For the interior, carefully clean the scanning glass and rollers with a Fujitsu-approved cleaning kit to prevent dust buildup. Refer to the manual for detailed steps on replacing consumables like brake rollers. Always power off the scanner before cleaning to prevent damage. Proper maintenance extends the scanner’s lifespan and ensures sharp, clear scans every time.

Troubleshooting Common Issues and Errors

Common issues with the ScanSnap iX500 include error messages during scanning or file insertion. Ensure the file is in PDF format and disk space is sufficient. Connectivity problems may arise; restart the scanner and check cable connections. For software-related issues, reinstall the latest drivers from the official Fujitsu website. Consult the manual for detailed troubleshooting steps. If problems persist, visit Fujitsu’s support page for additional resources or contact customer support for assistance. Regular updates and maintenance can prevent many common errors and ensure smooth operation.

Additional Resources and Support

Visit Fujitsu’s official support website for the ScanSnap iX500 to access FAQs, troubleshooting guides, and contact customer service for further assistance.

Downloading the Official ScanSnap iX500 Manual

The official ScanSnap iX500 manual is available for free download on Fujitsu’s support website. Visit the Fujitsu ScanSnap support page and select your scanner model. Click on the “Manuals” section to access the PDF guide. The manual covers installation, operation, and troubleshooting tips. It also includes detailed instructions for scanning, saving files, and maintaining the scanner. Downloading the manual ensures you have comprehensive guidance for optimizing your ScanSnap iX500 experience.

Accessing Online Support and User Guides

Fujitsu provides comprehensive online support for the ScanSnap iX500, ensuring easy access to user guides, troubleshooting, and software updates. Visit the official Fujitsu ScanSnap support page to explore resources like FAQs, manuals, and installation guides. Additionally, the site offers dedicated forums and customer service options for resolving issues. Users can also download the latest software updates and user guides directly from the portal. This ensures seamless operation and troubleshooting, making it easier to maximize the scanner’s potential.

targeted english language development instruction

Targeted English Language Development Instruction focuses on building essential English skills for ELLs through explicit, standards-aligned teaching, integrating listening, speaking, reading, and writing to enhance language mastery.

1.1 Definition and Purpose of Targeted ELD Instruction

Targeted English Language Development Instruction is a teaching approach designed to support multilingual learners in acquiring and refining English language skills. Its purpose is to provide explicit, standards-aligned instruction focused on the form and function of the language, enabling learners to effectively communicate and succeed academically. This approach ensures tailored support for diverse language needs.

1.2 Importance of Targeted ELD for Multilingual Learners

Targeted English Language Development Instruction is crucial for multilingual learners as it bridges language gaps, enabling access to academic content and fostering social interactions. It provides tailored support to overcome language barriers, ensuring learners can engage confidently in both academic and social settings. This approach is vital for promoting equitable education and fostering long-term academic success.

Principles of Targeted English Language Development Instruction

Targeted ELD instruction emphasizes explicit, systematic language teaching and alignment with English proficiency standards to ensure learners master academic and social English effectively and confidently.

2.1 Explicit and Systematic Language Teaching

Explicit and systematic language teaching in Targeted ELD involves clear, structured lessons that break down language components. Teachers use direct instruction and scaffolding to ensure learners understand and practice specific skills, building from simple to complex structures. This approach ensures learners grasp both the form and function of English, fostering steady progress in language proficiency.

2.2 Alignment with English Language Proficiency Standards

Targeted ELD instruction aligns with English Language Proficiency Standards, ensuring lessons address specific language skills and proficiency levels. These standards provide a framework for identifying learner needs, guiding instruction, and measuring progress. By integrating ELP Standards, teachers create structured, goal-oriented lessons that support learners in achieving both academic success and language growth.

Key Components of Targeted ELD Instruction

Targeted ELD instruction emphasizes form and function, integrates listening, speaking, reading, and writing, and prioritizes vocabulary development to build learners’ language proficiency systematically.

3.1 Focus on Form and Function of the English Language

Targeted ELD instruction emphasizes understanding both the structure (form) and purpose (function) of English. This includes grammar, vocabulary, and syntax, ensuring learners can use language effectively in real-life contexts. Explicit teaching of these elements helps students grasp how language works, enabling clear communication and academic success.

3.2 Integration of Listening, Speaking, Reading, and Writing Skills

Targeted ELD instruction integrates listening, speaking, reading, and writing to promote holistic language development. By combining these skills, learners engage in meaningful interactions, reinforcing language comprehension and production. Interactive activities like discussions, role-plays, and guided reading foster fluency and accuracy, preparing students for academic and real-world communication challenges.

3.3 Vocabulary Development and Academic Language

Targeted ELD instruction emphasizes vocabulary development and academic language to enhance learners’ understanding of complex texts and content. Explicit teaching of high-utility words and domain-specific terminology is prioritized. Instructional strategies include scaffolding, visual aids, and context clues to connect new vocabulary to prior knowledge, fostering learners’ ability to use language effectively in academic and real-world contexts.

The Role of Target Language in Instruction

Target language refers to the language learners are acquiring, such as English, and is central to instruction, enabling learners to communicate effectively in academic and real-world contexts.

4.1 Defining Target Language and Its Role in ELD

Target language refers to the language learners are acquiring, such as English, serving as the focal point of instruction. It enables learners to develop communication skills for academic and real-world contexts, forming the foundation of ELD by emphasizing language forms, functions, and vocabulary necessary for proficiency and meaningful engagement.

4.2 Strategies for Presenting and Practicing Target Language

Effective strategies include explicit presentation, guided practice, and interactive activities. Teachers use scaffolding techniques, visual aids, and real-world contexts to present target language. Practice involves structured exercises, pair work, and group discussions, promoting authentic use and reinforcing language proficiency through engaging and learner-centered approaches that cater to diverse learning needs and proficiency levels.

Differentiated Instruction in Targeted ELD

Differentiated instruction in Targeted ELD involves assessing learners’ language needs and tailoring strategies to support diverse proficiency levels, fostering language growth and academic success.

5.1 Assessing Learners’ Language Needs and Proficiency Levels

Assessing learners’ language needs involves evaluating their proficiency through formative and summative tools to identify strengths and gaps, ensuring targeted instruction aligns with their developmental stages and academic goals, fostering personalized growth and effective language development strategies.

5.2 Tailoring Instruction to Meet Diverse Learner Needs

Tailoring instruction involves creating differentiated learning experiences that cater to individual language proficiency levels, cultural backgrounds, and academic needs, leveraging scaffolding techniques, flexible grouping, and culturally responsive practices to ensure all learners engage effectively and progress towards language mastery.

The Difference Between Targeted and Integrated ELD Instruction

Targeted ELD focuses on explicit language skills in a dedicated setting, while integrated ELD embeds language development within content instruction, blending academic learning with language acquisition strategies.

6.1 Understanding Integrated ELD Instruction

Integrated ELD instruction embeds language development within content-area lessons, aligning with academic standards. It uses scaffolding techniques to support multilingual learners, promoting language acquisition through meaningful, context-rich activities that connect language to real-world tasks, enhancing both academic engagement and language proficiency simultaneously.

6.2 Comparing Targeted and Integrated Approaches

Targeted and integrated ELD approaches complement each other but differ in focus. Targeted ELD is explicit and systematic, focusing on specific language skills aligned with ELP standards, often during designated instruction time. Integrated ELD embeds language development within content-area lessons, connecting language to real-world tasks. While targeted instruction is separate from mainstream instruction, integrated ELD is woven into academic subjects, promoting language use in authentic contexts.

Best Practices for Implementing Targeted ELD Instruction

Best practices include creating a supportive environment, using scaffolding techniques, and aligning instruction with ELD standards to promote meaningful language practice and academic growth.

7.1 Creating a Supportive and Interactive Learning Environment

Fostering a supportive environment involves encouraging participation, using visual aids, and promoting peer interaction. Teachers should create opportunities for meaningful dialogue and provide scaffolding to build learners’ confidence and engagement, ensuring all students feel valued and motivated to excel in their English language development journey.

7.2 Using Scaffolding Techniques to Build Language Proficiency

Scaffolding involves temporary support to help learners master language skills. Techniques include modeling, guided practice, and gradual release of responsibility. This approach bridges gaps between current proficiency and desired outcomes, ensuring learners build confidence and independence in using English effectively for academic and social purposes.

The Role of Teachers in Targeted ELD Instruction

Teachers play a crucial role in designing explicit, systematic instruction aligned with ELD standards, supporting learners’ diverse needs, and using scaffolding techniques to promote language growth and proficiency.

8.1 Teacher Training and Professional Development

Teacher training and professional development are essential for effective Targeted ELD instruction. Educators must be well-versed in ELD standards, research-based methodologies, and cultural responsiveness. Ongoing professional learning ensures teachers can design engaging, scaffolded lessons tailored to learners’ needs, fostering language acquisition and academic success. Training programs often include workshops on explicit instruction, formative assessments, and integrating technology to enhance language development.

8.2 Effective Lesson Planning for Targeted ELD

Effective lesson planning for Targeted ELD involves aligning instruction with ELP standards, identifying clear language objectives, and using research-based methods. Teachers design scaffolded activities that build on learners’ prior knowledge, incorporating formative assessments to monitor progress. Lessons integrate listening, speaking, reading, and writing, ensuring learners practice both social and academic language. This structured approach maximizes language acquisition and academic readiness.

Assessing Progress in Targeted ELD Instruction

Assessing progress involves using formative and summative evaluations to monitor language growth, ensuring instruction aligns with learner needs and proficiency goals through data-driven adjustments.

9.1 Formative and Summative Assessment Strategies

Formative assessments monitor progress during instruction, using quizzes, observations, and informal checks to adjust teaching. Summative assessments evaluate learning at the end of a lesson or term, often through tests or projects. Both strategies ensure alignment with ELD goals, providing insights to refine instruction and measure learner outcomes effectively, while maintaining accountability and student growth tracking. These methods are crucial for guiding targeted ELD instruction and ensuring learners meet language proficiency standards.

9.2 Using Data to Inform Instructional Decisions

Data from formative and summative assessments helps identify learner strengths and areas needing improvement. Teachers analyze progress to adjust instruction, ensuring alignment with ELD goals. This data-driven approach supports personalized learning, fosters equity, and maximizes language growth, enabling targeted interventions and enhancing overall instructional effectiveness for multilingual learners.

The Role of Technology in Targeted ELD Instruction

Technology enhances Targeted ELD by providing interactive digital tools for language practice and access to online resources, supporting personalized learning and engagement for multilingual learners.

10.1 Digital Tools for Language Practice and Reinforcement

Digital tools provide interactive platforms for ELLs to practice listening, speaking, reading, and writing through engaging exercises and activities. These tools reinforce language structures, vocabulary, and pronunciation, offering immediate feedback to support progress. They also allow for personalized learning paths, enabling students to focus on specific skills and advance at their own pace, enhancing overall language proficiency.

10.2 Leveraging Online Resources for ELD Instruction

Online resources, such as language-learning apps and educational websites, provide interactive and engaging tools for ELLs to practice and reinforce English skills. Platforms like Duolingo, Babbel, and Khan Academy offer tailored exercises, while tools like Quizlet support vocabulary building. These resources enable personalized learning, allowing students to access materials anytime and track their progress, enhancing their language development journey.

Addressing the Needs of English Language Learners

Addressing the needs of English Language Learners involves culturally responsive teaching and supporting their social and academic language growth to ensure equitable access to education.

11.1 Cultural Responsiveness in ELD Instruction

Cultural responsiveness in ELD instruction involves understanding and valuing students’ diverse backgrounds to create inclusive learning environments. Teachers integrate culturally relevant texts, practices, and resources to promote engagement and equity, ensuring students’ cultural identities are respected and reflected in instruction. This approach fosters academic success and linguistic growth while bridging home and school experiences.

11.2 Supporting Learners’ Social and Academic Language Growth

Supporting learners’ social and academic language growth involves scaffolding interactions to build confidence and proficiency. Teachers encourage meaningful dialogue, integrate vocabulary development, and connect academic language to real-life contexts. This dual focus helps learners navigate both social interactions and complex academic tasks, fostering overall language competence and preparing them for success in diverse settings.

The Impact of Targeted ELD on Student Outcomes

Targeted ELD instruction significantly improves academic achievement and language proficiency, enabling learners to access content and succeed in educational settings while building confidence in their English abilities.

12.1 Improving Academic Achievement and Language Proficiency

Targeted ELD instruction boosts both academic success and language mastery by providing structured, explicit teaching methods. Students gain proficiency in understanding complex content and communicating effectively, fostering better performance across all subjects and enhancing their overall educational experience.

12.2 Building Learners’ Confidence and Engagement

Targeted ELD instruction not only enhances language skills but also fosters learners’ confidence and engagement. By providing tailored support and opportunities for meaningful communication, students develop a stronger sense of self-efficacy, leading to increased participation and motivation in both academic and social settings.

Targeted ELD instruction is vital for multilingual learners, fostering language mastery and academic success. Future directions include integrating technology and innovative teaching methods to enhance effectiveness.

13.1 Summary of Key Concepts

Targeted English Language Development Instruction is a structured approach focusing on explicit language teaching, alignment with proficiency standards, and integration of listening, speaking, reading, and writing. It emphasizes vocabulary development, cultural responsiveness, and scaffolding techniques to build proficiency. Teachers play a critical role in designing lessons and using data-driven strategies. This approach ensures multilingual learners acquire the skills needed for academic success and lifelong language growth.

13.2 Emerging Trends and Innovations in ELD Instruction

Emerging trends in ELD include personalized learning platforms, AI-driven language tools, and virtual reality for immersive practice. Integrating real-time data analytics to track progress and incorporating culturally responsive teaching methods are also gaining traction. Additionally, micro-credentials for teachers and adaptive technologies enhance instruction, ensuring tailored support for diverse learners and fostering equitable language growth opportunities.

wmh32519hz manual

Welcome to the WMH32519HZ manual‚ your comprehensive guide to understanding and operating the Whirlpool 1.9 cu. ft. Over-the-Range Microwave. This manual provides detailed insights into key features‚ installation‚ operation‚ and maintenance to ensure optimal performance and safety.

Key Features and Benefits of the WMH32519HZ

The Whirlpool WMH32519HZ offers a range of innovative features designed to enhance your cooking experience. With a 1.9 cu. ft. capacity‚ it provides ample space for large dishes. The fingerprint-resistant stainless steel finish ensures a sleek‚ durable appearance. This microwave boasts sensor cooking‚ which automatically adjusts cooking time for perfectly cooked meals. Additionally‚ the steam cooking function allows for healthy‚ moist cooking results. The multi-stage cooking feature enables you to customize power levels and cooking times in a single session. Its incandescent light provides clear visibility of your cooktop. These features make the WMH32519HZ a practical and efficient addition to any kitchen.

Installation and Setup

Ensure proper clearance and leveling before installation. Secure the unit firmly to the range hood or cabinet. Check electrical connections for safety and efficiency. Always follow manufacturer guidelines for a seamless setup process.

3.1. Pre-Installation Requirements

Before installing the Whirlpool WMH32519HZ microwave‚ ensure the area is clear and meets specific requirements. Verify that the electrical supply matches the microwave’s specifications‚ typically 120V‚ 60Hz‚ and 15A. The surrounding surfaces must be heat-resistant‚ and proper ventilation should be ensured. Check for adequate space above and around the unit to prevent overheating. Ensure the cabinet or range hood is sturdy and can support the microwave’s weight. Review local building codes and regulations to comply with installation standards. Gather all necessary tools and hardware provided with the unit to streamline the installation process. Proper preparation ensures a safe and efficient setup.

3.2. Step-by-Step Installation Guide

Begin by carefully unpacking the microwave and inspecting for damage. Ensure the installation area is clear and meets the specified requirements. Mount the provided template on the wall to mark screw holes for the mounting hardware. Drill pilot holes and secure the mounting bracket firmly. Carefully lift the microwave and align it with the bracket‚ ensuring it is level. Tighten the screws to hold the unit in place. Connect the electrical supply and venting system according to the manual’s instructions. Double-check all connections for safety and proper function. Finally‚ test the microwave to ensure it operates correctly. If unsure‚ consider consulting a professional for assistance.

3.3. Venting and Clearance Requirements

Proper venting and clearance are crucial for safe and efficient operation of the WMH32519HZ microwave. Ensure a minimum clearance of 3 inches from the top and sides of the microwave to adjacent surfaces. The unit must be installed at least 13 inches above the cooking surface to meet safety standards. For venting‚ choose between ducted or ductless options‚ depending on your kitchen setup. If using ducted ventilation‚ ensure the ductwork is properly sized and installed to avoid restricted airflow. Maintain a clean and unobstructed venting system to prevent moisture buildup and ensure optimal performance. Always follow local building codes and manufacturer recommendations for installation.

Operating the Microwave

Learn to operate the WMH32519HZ with ease. This section covers control panel overview‚ cooking modes‚ sensor cooking‚ and customizable settings for optimal performance.

  • Understand the intuitive control panel layout.
  • Explore sensor cooking for precise results.
  • Utilize steam cooking for healthier meals.
  • Customize settings to suit your preferences.

4.1. Control Panel Overview

The WMH32519HZ features a sleek‚ fingerprint-resistant stainless steel control panel designed for ease of use. The touch-sensitive interface includes a numeric keypad‚ Start‚ and Cancel buttons. The +30 Seconds option allows quick cooking adjustments. The panel also houses sensors for automatic cooking and defrosting‚ ensuring precise results. A large LCD display provides clear feedback on cooking settings‚ power levels‚ and remaining time. Additional buttons control the cooktop light and vent fan‚ enhancing overall kitchen functionality. The intuitive layout makes it easy to navigate various cooking modes and customization options‚ ensuring a seamless user experience. This section familiarizes you with the control panel’s features‚ empowering you to make the most of your microwave’s capabilities.

  1. Touch-sensitive buttons for effortless operation.
  2. Large LCD display for clear cooking feedback.
  3. Sensors for automatic cooking and defrosting.
  4. Quick-access buttons for common tasks.

4.2. Cooking Modes and Sensor Cooking

The WMH32519HZ offers versatile cooking modes‚ including sensor cooking‚ steam cooking‚ and traditional defrosting and reheating options. Sensor cooking automatically adjusts cooking time and power levels based on food moisture‚ ensuring perfectly cooked dishes; The microwave also features multiple power levels‚ allowing precise control for delicate foods. The steam cooking function uses water to maintain moisture and flavor in meals. For convenience‚ the microwave includes pre-set modes for common tasks like popcorn‚ baked potatoes‚ and frozen dinners. These features simplify cooking‚ reducing guesswork and ensuring consistent results. Explore the various modes to optimize your cooking experience and make the most of your microwave’s advanced capabilities.

  1. Sensor cooking for automatic adjustments.
  2. Steam cooking to retain moisture and flavor.
  3. Multiple power levels for precise control.
  4. Pre-set modes for popular cooking tasks.

4.3. Using the Steam Cooking Function

The WMH32519HZ features a steam cooking function‚ designed to cook food evenly while retaining moisture and flavor. To use this function‚ fill the provided steam bowl with water and place it in the microwave. Select the steam cooking mode on the control panel and choose the appropriate settings based on the type and quantity of food. The microwave will generate steam to cook your food gently. This mode is ideal for vegetables‚ seafood‚ and delicate dishes. Ensure the microwave is well-ventilated to avoid steam buildup. Cleaning the steam bowl after use is recommended to maintain hygiene and performance. This feature offers a healthy and efficient way to prepare meals without losing essential nutrients.

  1. Fill the steam bowl with water.
  2. Place the bowl in the microwave.
  3. Select the steam cooking mode.
  4. Adjust settings according to food type.
  5. Ensure proper ventilation.

4.4. Customizing Cooking Settings

The WMH32519HZ allows you to customize cooking settings to suit your preferences. Use the control panel to adjust power levels‚ cooking time‚ and sensor cooking sensitivity. Multi-stage cooking enables you to program different cooking phases‚ such as defrosting followed by cooking. You can also adjust the turntable speed and select from preset options for specific foods. For advanced customization‚ the microwave supports manual power level adjustments‚ allowing you to fine-tune cooking for delicate or thick foods. Additionally‚ the sensor cooking function can be calibrated based on your cooking habits. Always refer to the user manual for specific customization codes and guidelines to ensure optimal results. Experimenting with these settings can enhance cooking flexibility and performance.

Maintenance and Troubleshooting

Regularly clean filters and check for blockages to ensure optimal performance. Refer to the manual for troubleshooting common issues like uneven cooking or strange noises.

5.1. Cleaning and Care Tips

Regular cleaning is essential to maintain the performance and appearance of your WMH32519HZ microwave. Use a soft‚ damp cloth to wipe down the exterior‚ paying attention to fingerprints and splatters. For tougher stains‚ mix baking soda and water to create a gentle paste‚ then scrub and rinse thoroughly. The interior can be cleaned with a mixture of water and vinegar‚ heated for 2-3 minutes to loosen food residue. Avoid using abrasive cleaners or scouring pads‚ as they may damage surfaces. Clean the turntable and supports regularly and ensure the vent filters are free of debris for proper airflow. Always unplug the microwave before cleaning to ensure safety.

5.2. Replacing Filters and Parts

Regularly replacing filters and worn-out parts ensures optimal performance and longevity of your WMH32519HZ microwave. The charcoal filter‚ located in the venting system‚ should be replaced every 6-12 months or when odor control diminishes. Grease filters‚ found in the vent cover‚ should be cleaned monthly and replaced every 1-2 years. To replace these‚ turn off power‚ remove the vent cover‚ and detach the old filters. Inspect for damage and install new ones securely. For other parts‚ such as the turntable or support rollers‚ refer to the manual for specific instructions. Always use genuine Whirlpool replacement parts to maintain warranty validity and performance. Visit the Whirlpool website or authorized dealers for compatible parts.

5.3. Common Error Codes and Solutions

Your WMH32519HZ microwave may display error codes to indicate specific issues. One common error is E-01‚ which refers to a microwave oven malfunction. To resolve this‚ unplug the unit‚ wait 30 seconds‚ and plug it back in. If the issue persists‚ contact a professional. Another error‚ E-03‚ indicates a power supply problem. Ensure the microwave is properly installed and connected to a stable power source. For E-24‚ which relates to a faulty sensor‚ check if the cooking container is microwave-safe and restart the cycle. Always refer to your manual for specific code meanings and solutions. If errors recur‚ consult Whirlpool customer support or an authorized technician for assistance.

The Whirlpool WMH32519HZ microwave is a versatile and efficient appliance designed to enhance your cooking experience. By following the guidelines outlined in this manual‚ you can ensure optimal performance‚ safety‚ and longevity of your microwave. From installation and operation to maintenance and troubleshooting‚ this guide provides comprehensive support. The WMH32519HZ offers advanced features like sensor cooking and steam functionality‚ making meal preparation easier and more convenient. Regular cleaning and timely addressing of error codes will help maintain its performance. Should you encounter any issues‚ Whirlpool’s customer support is available to assist. Enjoy your microwave’s capabilities and explore new culinary possibilities with confidence.

harry potter and the order of the pheonix pdf

1.1 Overview of the Book

The fifth installment in J.K. Rowling’s series, Harry Potter and the Order of the Phoenix, explores Harry’s struggle against darkness and denial of Voldemort’s return, emphasizing themes of resistance and propaganda, while maintaining its magical charm and depth.

Harry Potter and the Order of the Phoenix, written by J;K. Rowling, is the fifth book in the beloved series. It follows Harry’s return to Hogwarts, where he faces skepticism about Voldemort’s return. The story delves into themes of resistance, propaganda, and the formation of Dumbledore’s Army, while maintaining the magical charm and depth that define the series.

1.2 Importance of the PDF Format

The PDF format of Harry Potter and the Order of the Phoenix offers convenient access to the book, allowing readers to enjoy it on various devices. It preserves the original formatting, making it ideal for fans and students. The digital version is widely available, ensuring accessibility and readability, while also maintaining the visual appeal of the story’s magical world.

Plot Summary

Harry Potter and the Order of the Phoenix follows Harry’s fifth year at Hogwarts, marked by the Ministry’s denial of Voldemort’s return, the formation of Dumbledore’s Army, and the climactic Battle of the Department of Mysteries, highlighting themes of resistance and the escalating wizarding conflict.

2.1 Main Themes and Conflicts

Harry Potter and the Order of the Phoenix delves into themes of resistance, propaganda, and adolescent struggle. Harry faces internal turmoil, disbelief from the wizarding world, and the oppressive regime of Dolores Umbridge. The Ministry’s denial of Voldemort’s return escalates tension, while Harry’s mission to unite allies against darkness drives the narrative, highlighting the clash between truth and manipulation.

2.2 The Role of the Ministry of Magic

The Ministry of Magic plays a pivotal role by denying Voldemort’s return, spreading propaganda, and interfering at Hogwarts. Their refusal to accept reality leads to the appointment of Dolores Umbridge, creating an oppressive environment and further isolating Harry, which escalates the central conflict and highlights the Ministry’s misguided priorities and corruption.

Key Characters

Harry Potter, alongside Dumbledore and the Order of the Phoenix, faces Voldemort and his followers. Dolores Umbridge, a Ministry-appointed oppressor, adds complexity to the conflict, highlighting the struggle between good and evil.

3.1 Harry Potter and His Allies

Harry, along with Ron Weasley and Hermione Granger, forms the core of the resistance. Together, they establish Dumbledore’s Army to counter the Dark Arts. Other key allies include Neville Longbottom, Ginny Weasley, and Luna Lovegood, who support Harry in his fight against Voldemort. Their unity and loyalty are pivotal in confronting the challenges they face.

3.2 The Villains and Their Motivations

Lord Voldemort seeks power and immortality, driving his return to dominance. Dolores Umbridge, a Ministry-appointed Hogwarts teacher, enforces oppressive rules, fueled by loyalty to the Ministry and desire for control. Death Eaters, Voldemort’s loyal followers, aim to spread fear and chaos, undermining the wizarding world to aid their master’s resurgence, making them formidable foes in Harry’s fight.

Symbolism and Themes

The novel explores themes of resistance, propaganda, and the struggle between good and evil, symbolized through Harry’s internal conflicts and the wizarding world’s fractured unity against Voldemort.

4.1 The Concept of Resistance

In Harry Potter and the Order of the Phoenix, resistance is central, as Harry and allies defy the Ministry’s denial of Voldemort’s return. The formation of Dumbledore’s Army symbolizes collective resistance against oppressive forces, while Harry’s internal struggle mirrors the broader fight against darkness, highlighting the power of resilience and unity in the face of tyranny.

4.2 The Influence of Propaganda

In Harry Potter and the Order of the Phoenix, propaganda plays a significant role in shaping public perception. The Ministry of Magic uses denial and misinformation to discredit Harry and Dumbledore, while the Order of the Phoenix counters with underground resistance. This reflects real-world dynamics of truth manipulation and control, highlighting the power of narrative in shaping reality and influencing collective action.

The Ministry of Magic’s Role

The Ministry of Magic’s interference in Hogwarts and denial of Voldemort’s return highlight their misguided priorities, showcasing their reluctance to acknowledge impending dangers and their clash with Dumbledore.

5.1 Denial of Voldemort’s Return

The Ministry of Magic’s refusal to acknowledge Voldemort’s return creates widespread denial and mistrust; Their disbelief isolates Harry, undermines Dumbledore’s authority, and fosters an environment of fear and misinformation, highlighting the Ministry’s obstructionist role in the story.

5.2 The Rise of the Order of the Phoenix

The Order of the Phoenix, re-formed by Dumbledore, unites wizards against Voldemort’s resurgence. Its mission is to counter the Ministry’s denial and protect Harry. This secret group plays a pivotal role in the story, showcasing resistance and resilience against dark forces, embodying hope and unity in the face of adversity.

Dumbledore’s Army

Dumbledore’s Army, formed by Harry, teaches students defensive magic amid the Ministry’s interference. Its creation counters Umbridge’s refusal to teach practical spells, fostering unity and preparedness among members.

6.1 Formation and Purpose

Dumbledore’s Army was formed by Harry Potter to counteract Professor Umbridge’s ineffective teaching. The group aimed to learn practical defensive magic, preparing students for real threats. Secret meetings in the Room of Requirement allowed members to master spells and strategies. This initiative fostered unity and empowerment among students, despite the Ministry’s interference and denial of Voldemort’s return.

6.2 Key Battles and Outcomes

The Battle of the Department of Mysteries marked a pivotal clash between Dumbledore’s Army and Death Eaters. Despite heavy casualties, the fight led to the Ministry acknowledging Voldemort’s return, validating Harry’s claims. This victory energized the wizarding world, galvanizing support for the Order of the Phoenix and setting the stage for future resistance against the Dark Lord’s forces.

The Book’s Reception

Harry Potter and the Order of the Phoenix received widespread critical acclaim, praised for its darker themes and character development. It became a commercial success globally, resonating deeply with fans and solidifying its place in the series’ legacy.

7.1 Critical Reviews and Acclaim

Harry Potter and the Order of the Phoenix garnered widespread critical acclaim for its rich storytelling, deeper themes, and character development. Reviewers praised its emotional depth, with many highlighting its exploration of resistance and propaganda. The book was celebrated as a masterpiece, solidifying its place as a fan favorite and a pivotal installment in the series.

7.2 Fan Reactions and Popularity

Fans enthusiastically embraced Harry Potter and the Order of the Phoenix, praising its intense plot and emotional depth. The book’s popularity soared, with many considering it a turning point in the series. Its themes resonated widely, making it a beloved favorite among readers and cementing its place in the cultural phenomenon of the Harry Potter franchise.

PDF Version and Accessibility

The Harry Potter and the Order of the Phoenix PDF offers a convenient and portable reading experience, with a file size of 3.4 MB. Fans can easily access and read it on various devices, making the story more accessible to a global audience while preserving the magic of the original text.

8.1 Benefits of the Digital Format

The Harry Potter and the Order of the Phoenix PDF offers unparalleled convenience, allowing readers to access the book on multiple devices. Its digital format enables easy searching, adjustable fonts, and portability, making it ideal for fans seeking flexibility. The 3.4 MB file size ensures quick downloads, while the text remains crisp and readable, enhancing the overall reading experience for both casual and dedicated fans of the series.

8.2 Where to Download the PDF Legally

The Harry Potter and the Order of the Phoenix PDF can be legally downloaded from authorized platforms like Amazon, Barnes & Noble, Kobo, or Scribd. These sites offer secure and high-quality digital versions, ensuring you support the author and publisher. Purchasing or subscribing through these services guarantees an authentic and virus-free download, while also respecting copyright laws and the creative work behind the novel.

Audiobook and Movie Adaptations

The audiobook, narrated by Jim Dale, captivates listeners with its immersive storytelling, while the movie adaptation successfully translates the novel’s magic to the big screen, delighting fans globally.

9.1 The Audiobook Version

The audiobook of Harry Potter and the Order of the Phoenix, narrated by Jim Dale, offers an engaging and immersive listening experience. Dale’s versatile voice brings characters to life, enhancing the story’s emotional depth. The audiobook is available in various formats, including digital downloads, making it accessible to fans worldwide. It remains a popular choice for those who enjoy auditory storytelling.

9.2 The Movie Adaptation’s Success

The movie adaptation of Harry Potter and the Order of the Phoenix, released in 2007, achieved significant success. Directed by David Yates, it became the second-highest-grossing film in the series, praised for its visual effects and faithfulness to the book. The film captured the emotional depth of the story, resonating with both fans and critics, solidifying its place in the franchise’s legacy.

Educational and Analytical Perspectives

Harry Potter and the Order of the Phoenix is widely studied for its political commentary and literary depth, offering insights into resistance, propaganda, and authoritarianism, making it a valuable educational resource for analyzing societal structures and human behavior through a magical lens.

10.1 Political and Social Commentary

Harry Potter and the Order of the Phoenix offers a compelling political commentary, highlighting the Ministry of Magic’s denial of Voldemort’s return and its authoritarian tactics. The novel critiques propaganda, corruption, and the suppression of truth, mirroring real-world issues. It also explores themes of resistance, as seen in the formation of Dumbledore’s Army, reflecting the power of collective action against oppressive systems. The story resonates with contemporary societal struggles, making it a rich text for analyzing power dynamics and governance.

10.2 Literary Analysis of the Novel

Harry Potter and the Order of the Phoenix is celebrated for its rich literary depth, exploring themes of isolation, rebellion, and the struggle between truth and propaganda. The novel’s narrative structure, with its layered conflicts and emotional complexity, showcases Rowling’s mastery of storytelling. The character development, particularly Harry’s internal battles, adds profound psychological depth, making it a standout in the series and a subject of extensive literary analysis.

Impact on the Harry Potter Franchise

Harry Potter and the Order of the Phoenix significantly influenced the franchise by setting the stage for future books and deepening the series’ complexity and character development.

11.1 Setting the Stage for Future Books

Harry Potter and the Order of the Phoenix laid the groundwork for subsequent novels by revealing Voldemort’s return and the prophecy, which became pivotal in the final books, ensuring continuity and heightening anticipation among readers for the ultimate showdown between good and evil.

11.2 Cultural Significance of the Story

Harry Potter and the Order of the Phoenix has become a cultural phenomenon, resonating globally with its themes of resistance and hope, influencing literature, film, and fan communities, while its PDF availability has made it accessible worldwide, ensuring its enduring impact on modern pop culture and storytelling.

The book’s enduring legacy and the convenience of its PDF format ensure its continued relevance and accessibility, solidifying its place in the Harry Potter saga.

12.1 Final Thoughts on the Book

Harry Potter and the Order of the Phoenix stands as a pivotal installment, masterfully blending emotional depth with magical storytelling. Its exploration of resistance and propaganda resonates deeply, while the PDF format ensures accessibility for modern readers, preserving its timeless appeal and making it a cherished addition to the series.

12.2 Legacy of “Harry Potter and the Order of the Phoenix”

Harry Potter and the Order of the Phoenix remains a cornerstone of the series, celebrated for its exploration of resistance and propaganda. The PDF format has ensured its accessibility, solidifying its legacy as a pivotal narrative that continues to captivate readers worldwide, leaving a lasting impact on the series and the literary world at large.

ge oven shabbos mode manual pdf

The GE Oven Shabbos Mode is a feature designed to accommodate Jewish Sabbath observances, allowing continuous baking with disabled lights and tones for unattended cooking during holidays and Shabbat.

Overview of Shabbos Mode and Its Purpose

Shabbos Mode is a specialized feature on GE ovens designed to accommodate Jewish Sabbath and holiday observances. Its primary purpose is to allow users to cook without directly engaging with the oven controls, adhering to religious guidelines that prohibit operating electrical appliances during Shabbat. This mode ensures continuous baking or cooking at a set temperature, eliminating the need to adjust settings manually. By disabling features like oven lights and tones, Shabbos Mode prevents accidental violations of Sabbath laws. It is a thoughtful solution for observant individuals, enabling them to prepare meals conveniently while respecting traditional practices. This feature is certified by Star-K, a trusted authority on Jewish dietary laws, ensuring compliance with Sabbath requirements.

Importance of Using the GE Oven Shabbos Mode Manual

The GE Oven Shabbos Mode Manual is essential for understanding how to properly activate and use the Shabbos Mode feature. It provides step-by-step instructions to ensure users can enable the mode correctly, avoiding common mistakes. The manual outlines the specific settings and operations allowed during Shabbat, helping users adhere to religious guidelines. It also explains how features like continuous baking and temperature control work in this mode. Additionally, the manual includes troubleshooting tips for issues that may arise, ensuring uninterrupted cooking. By following the manual, users can optimize their oven’s performance while maintaining compliance with Jewish Sabbath laws. It serves as a comprehensive guide, making it indispensable for anyone using this specialized feature.

How to Activate Shabbos Mode on Your GE Oven

Press and hold the Bake button until “SAb” appears on the display, then press Start to confirm and activate Shabbos Mode on your GE oven.

Step-by-Step Instructions for Enabling Shabbos Mode

To enable Shabbos Mode on your GE oven, start by ensuring the oven is preheated and set to the desired temperature. Next, locate the Bake button on the control panel. Press and hold the Bake button until “SAb” appears on the display. Once “SAb” is shown, release the Bake button and immediately press the Start button to confirm activation. The oven will enter Shabbos Mode, indicated by the “SAb” prompt remaining on the screen. During this mode, features like oven lights and tones will be disabled, and the oven will remain on continuously until manually turned off. Note that Shabbos Mode can only be used with the Bake function and is designed to comply with Jewish Sabbath observances. Always refer to your GE oven manual for additional guidance or troubleshooting.

Understanding the Sabbath Mode Prompt and Confirmation

When enabling Shabbos Mode, your GE oven will display “SAb” on the control panel, indicating the mode is active. This prompt confirms that the oven has entered Sabbath Mode, during which features like oven lights and tones are disabled. Once “SAb” appears, press the Start button to confirm activation. The oven will then remain on continuously at the set temperature until manually turned off. It is important to note that while in this mode, the oven cannot be adjusted or turned off using standard controls. To exit Shabbos Mode, you must wait until the Sabbath or holiday has ended and then manually reset the oven. This feature ensures compliance with Jewish Sabbath observances by preventing any direct interaction with the oven during this time.

Key Features of Shabbos Mode

Shabbos Mode disables oven lights and tones, ensuring compliance with Jewish Sabbath observances. It allows continuous baking at a set temperature without interruptions or adjustments.

Disabled Features: Oven Lights and Tones

When Shabbos Mode is activated, the oven’s lights and tones are automatically disabled to comply with Jewish Sabbath observances. The oven light, which typically illuminates when the door is opened or during operation, remains off to prevent any accidental activation. Similarly, all audible tones, such as those that signal the end of a cooking cycle or button presses, are silenced. This feature ensures that the oven operates without any interference, allowing for unattended cooking throughout the Sabbath and holidays. By disabling these features, GE ovens help users adhere to the requirements of Shabbat, providing a convenient and respectful cooking solution during observant periods. The manual provides detailed instructions on how to enable this mode, ensuring a seamless experience for those who observe the Sabbath.

Continuous Baking and Temperature Settings in Sabbath Mode

In Sabbath Mode, the GE oven is designed to allow continuous baking without interruptions, ensuring that food remains cooking throughout the Sabbath or holidays. Once activated, the oven will operate without stopping until it is manually turned off, making it ideal for long cooking tasks. The temperature settings remain consistent and can be pre-set according to the user’s needs, providing reliable results. This feature is particularly useful for dishes that require extended cooking times, such as cholent or roasted meals. The manual provides clear instructions on how to configure the temperature and baking mode before enabling Sabbath Mode. By maintaining a steady temperature and continuous operation, the GE oven simplifies observance of Jewish Sabbath traditions, offering a convenient and respectful cooking solution for families and individuals alike.

Troubleshooting Shabbos Mode

Common issues include the oven not responding or continuous operation. Refer to the manual for reset instructions or ensure proper activation steps were followed for Shabbos Mode.

Common Issues and Solutions

While using GE Oven Shabbos Mode, users may encounter issues such as the oven not responding or remaining in continuous operation. If the oven fails to activate Sabbath Mode, ensure the correct activation steps are followed. Power interruptions can sometimes disable the mode, requiring a reset. Additionally, the oven light may stay on despite being disabled in Sabbath Mode. To resolve this, consult the manual for specific instructions on resetting or reactivating the mode. If the oven does not maintain the set temperature, verify the temperature settings and ensure no obstructions are present. For persistent issues, refer to the troubleshooting section in the manual or contact GE customer support for assistance. Always follow safety guidelines and operating instructions provided in the manual to avoid complications during use.

  • If the oven light stays on, check the manual for reset procedures.
  • After power interruptions, re-enable Sabbath Mode manually.
  • Ensure temperature settings are correct for continuous baking.

The GE Oven Shabbos Mode offers a convenient solution for observant users, ensuring compliance with Sabbath traditions while maintaining continuous baking functionality. Always refer to the manual for proper activation and troubleshooting guidance.

Final Thoughts on Using GE Oven Shabbos Mode

Using the GE Oven Shabbos Mode is a practical and respectful way to observe Jewish traditions during the Sabbath and holidays. This feature ensures continuous baking without interruptions, adhering to religious guidelines. By disabling oven lights, tones, and manual controls, it simplifies cooking while maintaining observance. The mode is especially useful for long-term dishes, such as cholent, offering both convenience and compliance. Always refer to the GE Oven Shabbos Mode manual for activation steps and troubleshooting tips to ensure smooth operation. Proper use of this feature not only enhances your cooking experience but also aligns with the spirit of Shabbat. Remember to follow safety guidelines and manual instructions to get the most out of this innovative feature designed for observant users.

red white and royal blue pdf

Overview of “Red, White, and Royal Blue”

Casey McQuiston’s Red, White, and Royal Blue is a captivating romantic comedy that follows Alex Claremont-Diaz, the First Son of the United States, and his forbidden relationship with Prince Henry of Wales․ Blending witty humor, political drama, and heartfelt romance, the novel explores themes of identity, duty, and love, making it a modern classic in contemporary literature․

Red, White, and Royal Blue by Casey McQuiston introduces Alex Claremont-Diaz, the charismatic First Son of the United States, and his accidental yet profound connection with Prince Henry of Wales․ This romantic comedy skillfully intertwines political intrigue, witty banter, and heartfelt emotion, exploring themes of identity, duty, and love․ The novel captivates readers with its relatable characters and a story that transcends borders and expectations․

1․2․ Themes and Genre

Red, White, and Royal Blue blends romantic comedy with political drama, exploring themes of identity, duty, and love․ The novel delves into the complexities of public life, personal identity, and the challenges of balancing both․ Its genre-defying approach captivates readers with a mix of witty humor, heartfelt emotion, and a fresh take on romance, making it a standout in contemporary literature and a favorite among diverse audiences․

Plot Summary

Red, White, and Royal Blue follows Alex Claremont-Diaz, the First Son of the United States, as he navigates an unexpected romance with Prince Henry of Wales, blending love, duty, and identity amidst political intrigue and personal growth․

2․1․ Main Characters and Relationships

Alex Claremont-Diaz, the charming yet guarded First Son, and Prince Henry, the stoic British royal, form a forbidden bond․ Their relationship evolves from rivalry to deep affection, navigating cultural and political barriers․ The novel also explores Alex’s close-knit family, including his mother, the President, and his sister, who add depth to the story․ Their interactions shape the narrative’s emotional core and conflicts․

2․2․ Central Conflict and Development

The central conflict arises from Alex and Henry’s forbidden relationship, threatened by political scrutiny and public exposure․ Their bond deepens despite barriers, but a leaked photo forces them to confront the consequences․ The novel explores the tension between duty and desire, as they navigate love, identity, and the pressures of their high-profile roles, leading to a dramatic resolution that tests their commitment to each other and their futures․

Cultural and Social Impact

Red, White, and Royal Blue sparked widespread acclaim for its fresh take on romance and politics, resonating deeply with readers and fostering meaningful conversations about identity and love․

3․1․ Popularity on Social Media

Red, White, and Royal Blue became a viral sensation on platforms like Instagram and TikTok, with fans creating countless memes, fan art, and discussions․ Its relatable humor and heartfelt romance resonated widely, making it a staple on Bookstagram and a trending topic among readers․ The novel’s popularity also led to a film adaptation, further amplifying its reach and sparking excitement across social media communities․

3;2․ Representation of LGBTQ+ Themes

Red, White, and Royal Blue champions LGBTQ+ representation through its central romance between Alex and Prince Henry․ The novel portrays their relationship with authenticity and sensitivity, highlighting the challenges and triumphs of same-sex love in the public eye․ Its positive portrayal has resonated deeply with the LGBTQ+ community, earning praise for its realistic and empowering depiction of queer love and identity․

Adaptations and Media Presence

Red, White, and Royal Blue has been adapted into a film on Prime Video, bringing its iconic story to a wider audience and further cementing its cultural impact․

4․1․ Film Adaptation and Changes from the Book

The film adaptation of Red, White, and Royal Blue on Prime Video retains the core relationship but introduces changes, such as relocating the iconic balcony kiss and expanding Henry’s mother’s role, which was minimal in the book․ The movie also heightens dramatic moments, like the ending, offering a fresh yet faithful take on Casey McQuiston’s original story while staying true to its emotional essence and fan-favorite scenes․

4․2․ Reception of the Movie

The film adaptation of Red, White, and Royal Blue has sparked significant buzz, particularly for its cultural impact and LGBTQ+ representation․ Fans praised the casting choices, while some noted minor deviations from the book․ The movie’s release on Prime Video further amplified its reach, resonating with audiences who connected with its blend of romance, humor, and political drama, solidifying its place as a beloved queer rom-com․

Author Background

Casey McQuiston is an American author celebrated for their debut novel, blending romance and LGBTQ+ themes with humor and drama, impacting contemporary literature․

5․1․ Casey McQuiston’s Writing Style

Casey McQuiston’s writing style is renowned for its blend of witty humor, heartfelt romance, and sharp political commentary․ With a keen ability to balance light-hearted moments with profound emotional depth, McQuiston creates relatable characters and immersive narratives that captivate readers․ Their prose is both engaging and evocative, making complex themes feel accessible and deeply personal․

5․2․ Inspiration Behind the Novel

Casey McQuiston drew inspiration from modern politics, romance, and the complexities of public life․ The idea of a forbidden relationship between a First Son and a British prince sparked a fresh take on traditional romance tropes․ The novel’s blend of humor, drama, and cultural relevance resonated deeply, making it a standout in contemporary literature and a favorite among readers worldwide;

Reading and Availability

Red, White, and Royal Blue is widely available in paperback, hardcover, and digital formats on platforms like Amazon and Kindle Unlimited, making it accessible to global readers․

6․1․ Formats and Editions

Red, White, and Royal Blue is available in various formats, including paperback, hardcover, e-book, and audiobook․ Special editions, such as anniversary editions, feature exclusive content․ The novel is also accessible through platforms like Amazon Kindle, Barnes & Noble Nook, and Apple Books․ Additionally, the book is part of Kindle Unlimited, allowing subscribers to read it as part of their membership․ Its widespread availability ensures global readers can enjoy this modern romance classic․

6․2․ Availability on Platforms

Red, White, and Royal Blue is widely available across major platforms, including Amazon Kindle, Barnes & Noble Nook, and Apple Books․ The e-book and audiobook versions are accessible on these platforms, offering convenience for digital readers․ Additionally, the novel is part of Kindle Unlimited, allowing subscribers to read it as part of their membership․ Its availability on Prime Video as a movie adaptation further extends its reach to a broader audience․

Reader Reviews and Ratings

Red, White, and Royal Blue has received widespread acclaim, with an average rating of 4․7 stars on Amazon and 4․9 stars on other platforms․ Readers praise its witty dialogue, relatable characters, and heartfelt romance, making it a favorite among fans of romantic comedies and LGBTQ+ literature․

7․1․ Critical Acclaim and Awards

Red, White, and Royal Blue has garnered significant critical acclaim, becoming a New York Times bestseller and earning a Goodreads Choice Award nomination in 2019․ Critics praised its witty dialogue, heartfelt romance, and nuanced exploration of identity․ The novel has been hailed as a modern classic in LGBTQ+ literature, with reviewers describing it as “absorbing, hilarious, tender, and sexy․” Its success has solidified Casey McQuiston’s reputation as a rising star in contemporary fiction․

7․2․ Fan Reactions and Memes

Fans of Red, White, and Royal Blue have created a vibrant online community, with countless memes, fan art, and fan fiction circulating on platforms like Tumblr and Twitter․ The book’s witty dialogue and romantic tension between Alex and Henry have inspired viral memes, while fan art often captures the characters’ chemistry․ The fandom’s creativity highlights the novel’s emotional resonance and its ability to connect deeply with readers worldwide․

Historical and Political Context

Red, White, and Royal Blue blends fictional politics with real-world royalty, exploring the intersection of American leadership and British monarchy through Alex and Henry’s relationship․

8․1․ Portrayal of Politics in the Novel

The novel vividly portrays the intricate world of politics through Alex’s role as the First Son, highlighting the pressures of public image and the complexities of international diplomacy․ McQuiston weaves real-world political scenarios with fictional elements, creating a relatable yet engaging narrative that explores the challenges of balancing personal identity with public duty and expectations․

8․2․ Royal and Presidential Dynamics

The novel explores the intricate dynamics between the British monarchy and the American presidency, highlighting the tension between tradition and modernity․ Alex and Henry’s relationship bridges these worlds, challenging societal expectations while navigating the pressures of their respective roles․ Their bond tests the boundaries of duty, family, and love, ultimately reshaping perceptions of leadership and identity on both sides of the Atlantic․

Romantic and Comedic Elements

Red, White, and Royal Blue masterfully blends heartwarming romance with sharp humor, creating a charming narrative that balances tender moments with witty banter, making it a delightful read․

9․1․ Balance of Humor and Drama

Casey McQuiston skillfully balances humor and drama in Red, White, and Royal Blue, blending witty dialogue and comedic situations with emotional depth․ The novel’s lighthearted moments, such as Alex’s banter with Henry, contrast beautifully with poignant scenes exploring identity and societal pressures, creating a narrative that feels both entertaining and heartfelt, keeping readers engaged and invested in the characters’ journeys․

9․2․ Chemistry Between Protagonists

The chemistry between Alex and Henry in Red, White, and Royal Blue is undeniable, blending emotional depth with playful banter․ Their relationship evolves from initial tension to heartfelt connection, creating a dynamic that captivates readers․ McQuiston masterfully portrays their interactions, making their romance feel authentic and compelling, leaving a lasting impression on the narrative and its audience․

Symbolism and Metaphors

The title’s colors symbolize passion, purity, and royalty, reflecting the characters’ journeys․ The novel uses metaphors to explore societal expectations and love’s transformative power, resonating deeply․

10․1․ Use of Colors in the Title

The title’s colors—red, white, and royal blue—hold deep symbolic meaning․ Red signifies passion and conflict, white represents purity and idealism, while royal blue embodies royalty and duty․ Together, they reflect the novel’s exploration of love, identity, and societal expectations, encapsulating the emotional and political dynamics of Alex and Henry’s story․

10․2․ Symbolic Events and Scenes

Key events, like Alex and Henry’s initial clash and their private, heartfelt moments, symbolize the tension between duty and love․ Their public appearances contrast with intimate scenes, highlighting the struggle to balance royal and political expectations with personal emotions․ These moments underscore the novel’s themes of identity, sacrifice, and the pursuit of authenticity amidst societal pressures․

Fan Engagement and Community

Fans of Red, White, and Royal Blue have created a vibrant community, sharing fan art, fan fiction, and discussions on platforms like Pinterest, Bookstagram, and TikTok, showcasing their love for the novel․

11․1․ Fan Art and Fan Fiction

Fans of Red, White, and Royal Blue have created a wealth of fan art and fiction, showcasing their love for Alex and Henry․ From romantic scenes to humorous memes, fans express their creativity on platforms like Pinterest and Tumblr․ Fan fiction explores alternate storylines, while fan art captures the chemistry between the protagonists․ A bonus PDF even highlights Alex’s reading material, further engaging the passionate fanbase․

11․2․ Book Clubs and Discussions

Red, White, and Royal Blue has become a favorite in book clubs, sparking lively discussions about its blend of romance, politics, and humor․ Readers share insights on platforms like Goodreads and Instagram, while PDF summaries and guides aid deeper analysis․ The novel’s universal appeal continues to foster a sense of community, making it a timeless choice for book clubs worldwide․

Red, White, and Royal Blue has cemented its place as a cultural phenomenon, inspiring countless readers and leaving a lasting impact on contemporary literature with its timeless romance․

12․1․ Impact on Contemporary Literature

Red, White, and Royal Blue has revolutionized contemporary romance literature, blending politics, humor, and heartfelt drama․ Its massive success has inspired a wave of LGBTQ+ rom-coms, proving diverse stories resonate globally․ The novel’s fresh voice and relatable characters have redefined the genre, making it a blueprint for modern romance writers and cementing its legacy as a cultural and literary milestone․

12․2․ Future of the Story and Sequels

While Red, White, and Royal Blue stands as a complete narrative, fans speculate about potential sequels or spin-offs․ Casey McQuiston has expressed interest in exploring secondary characters, offering new perspectives within the beloved universe․ The novel’s success has sparked hopes for extended stories, though no official announcements have been made․ Its enduring popularity ensures its influence will continue shaping modern romance literature and adaptations․